Take two Button up Shirts and turn them into one fashionable top
Combining two tops to create one blouse is a great way to change up old shirts. If a shirt has too much wear in a spot it is easy to work around the worn area while still creating a new fantastic top. Today I am going to take two long sleeved button up shirts and turn them into a cold shoulder up-cycled stylish top.
Gather your materials
- Two Long sleeve button up shirts
- Thread
- Your new top pattern
- Scissors
- Chalk / Fabric Marking Pen
- Sewing Machine / Serger
- Iron
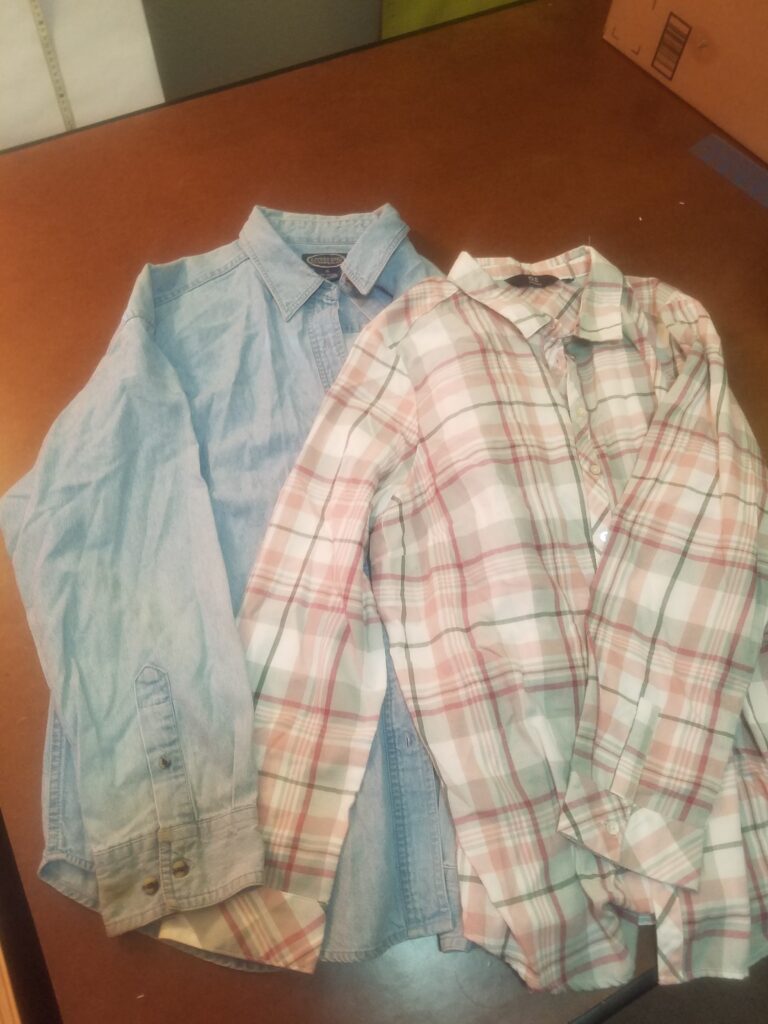
First we want to make sure we are starting with clean shirts so throw those two shirts in the washer and dryer. Once they are clean give them a press so that they are not wrinkly. This makes marking out our pattern easier because we will not be fighting against the wrinkles.
Laying out and Cutting the Pattern
Front Patter Pieces
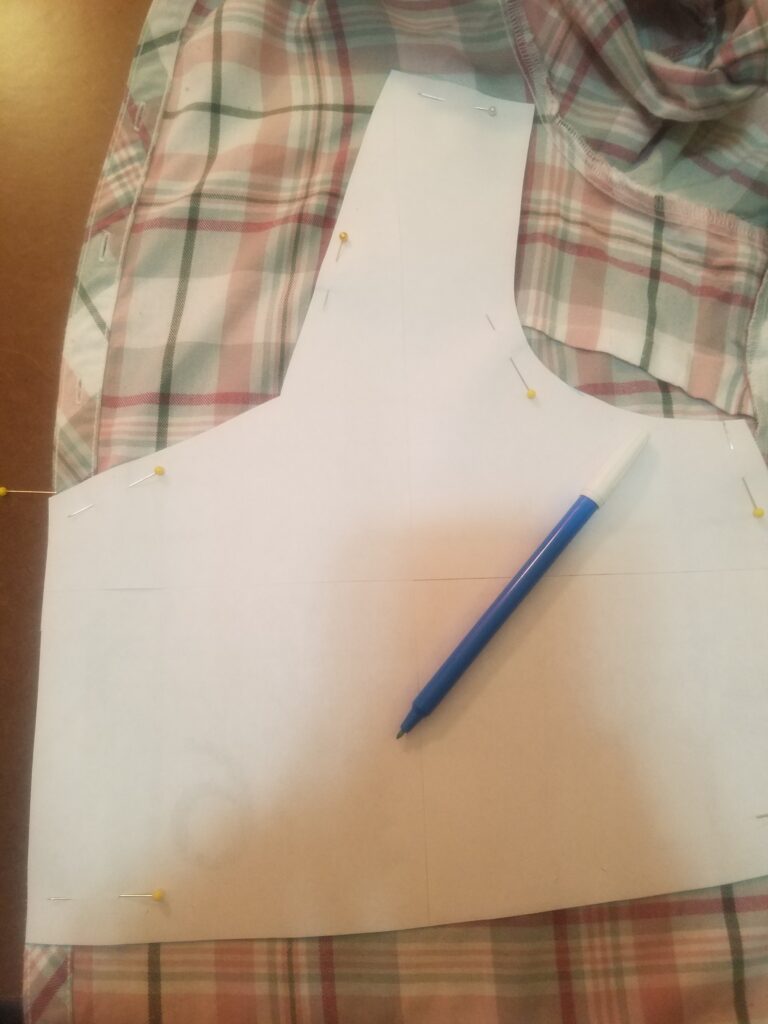
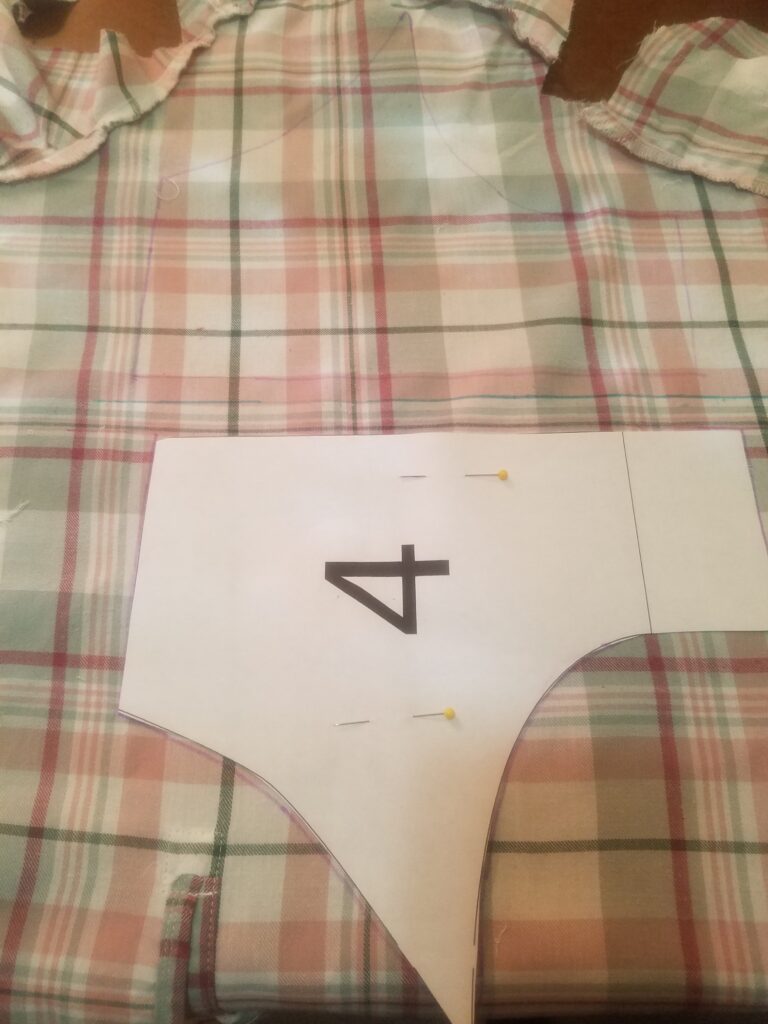
Next we are going to layout our pattern making sure to line up the top edge of the center front line with either side of the buttons. We are going to be reusing the buttons down the center front to create the closure on the upcycled stylish top.
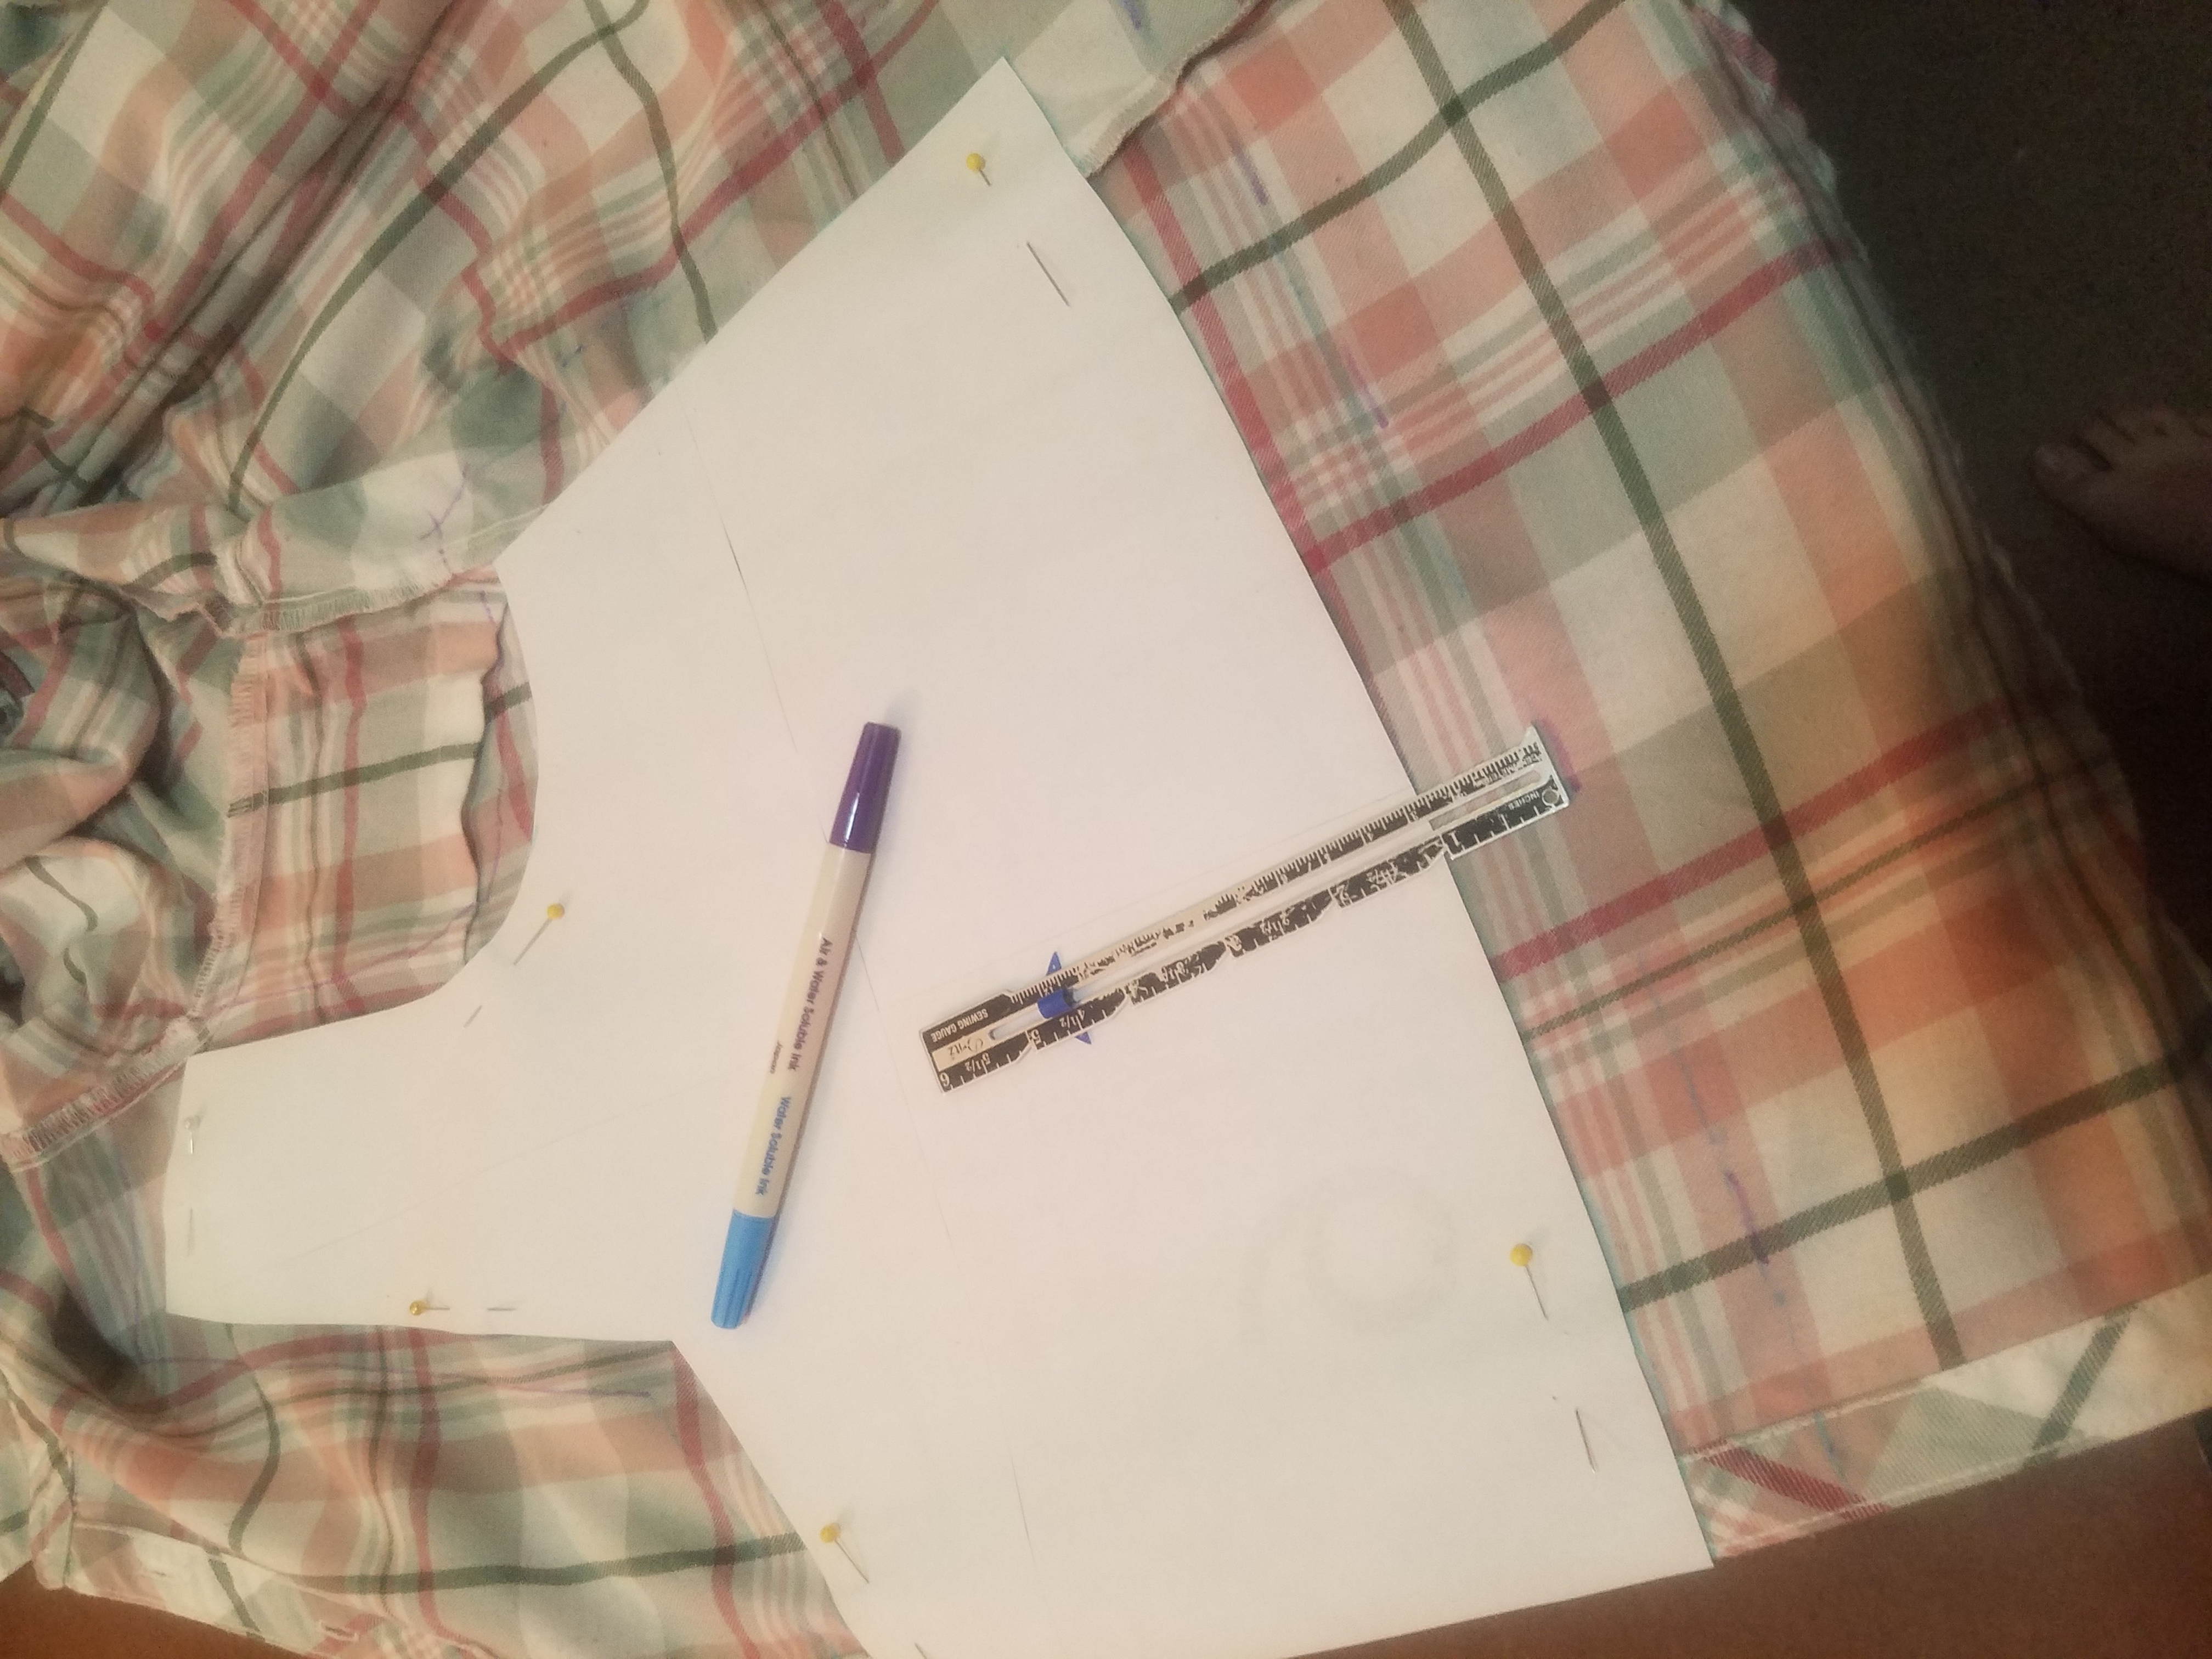
Trace around the pattern marking out the stitch line. Then determine the amount of seam allowance and trace around the pattern again measuring out the allotted seam allowance. If I am working with a pattern that I have never put together before I will add a inch seam allowance at the hem and side seams. This little bit of extra fabric can easily be trimmed away after the garment is fit. Or provide the bodice a little more room to let out if the top is sung in the first fitting. We will replicate this process on the solid shirt for the bottom half pattern pieces.
Back pattern pieces

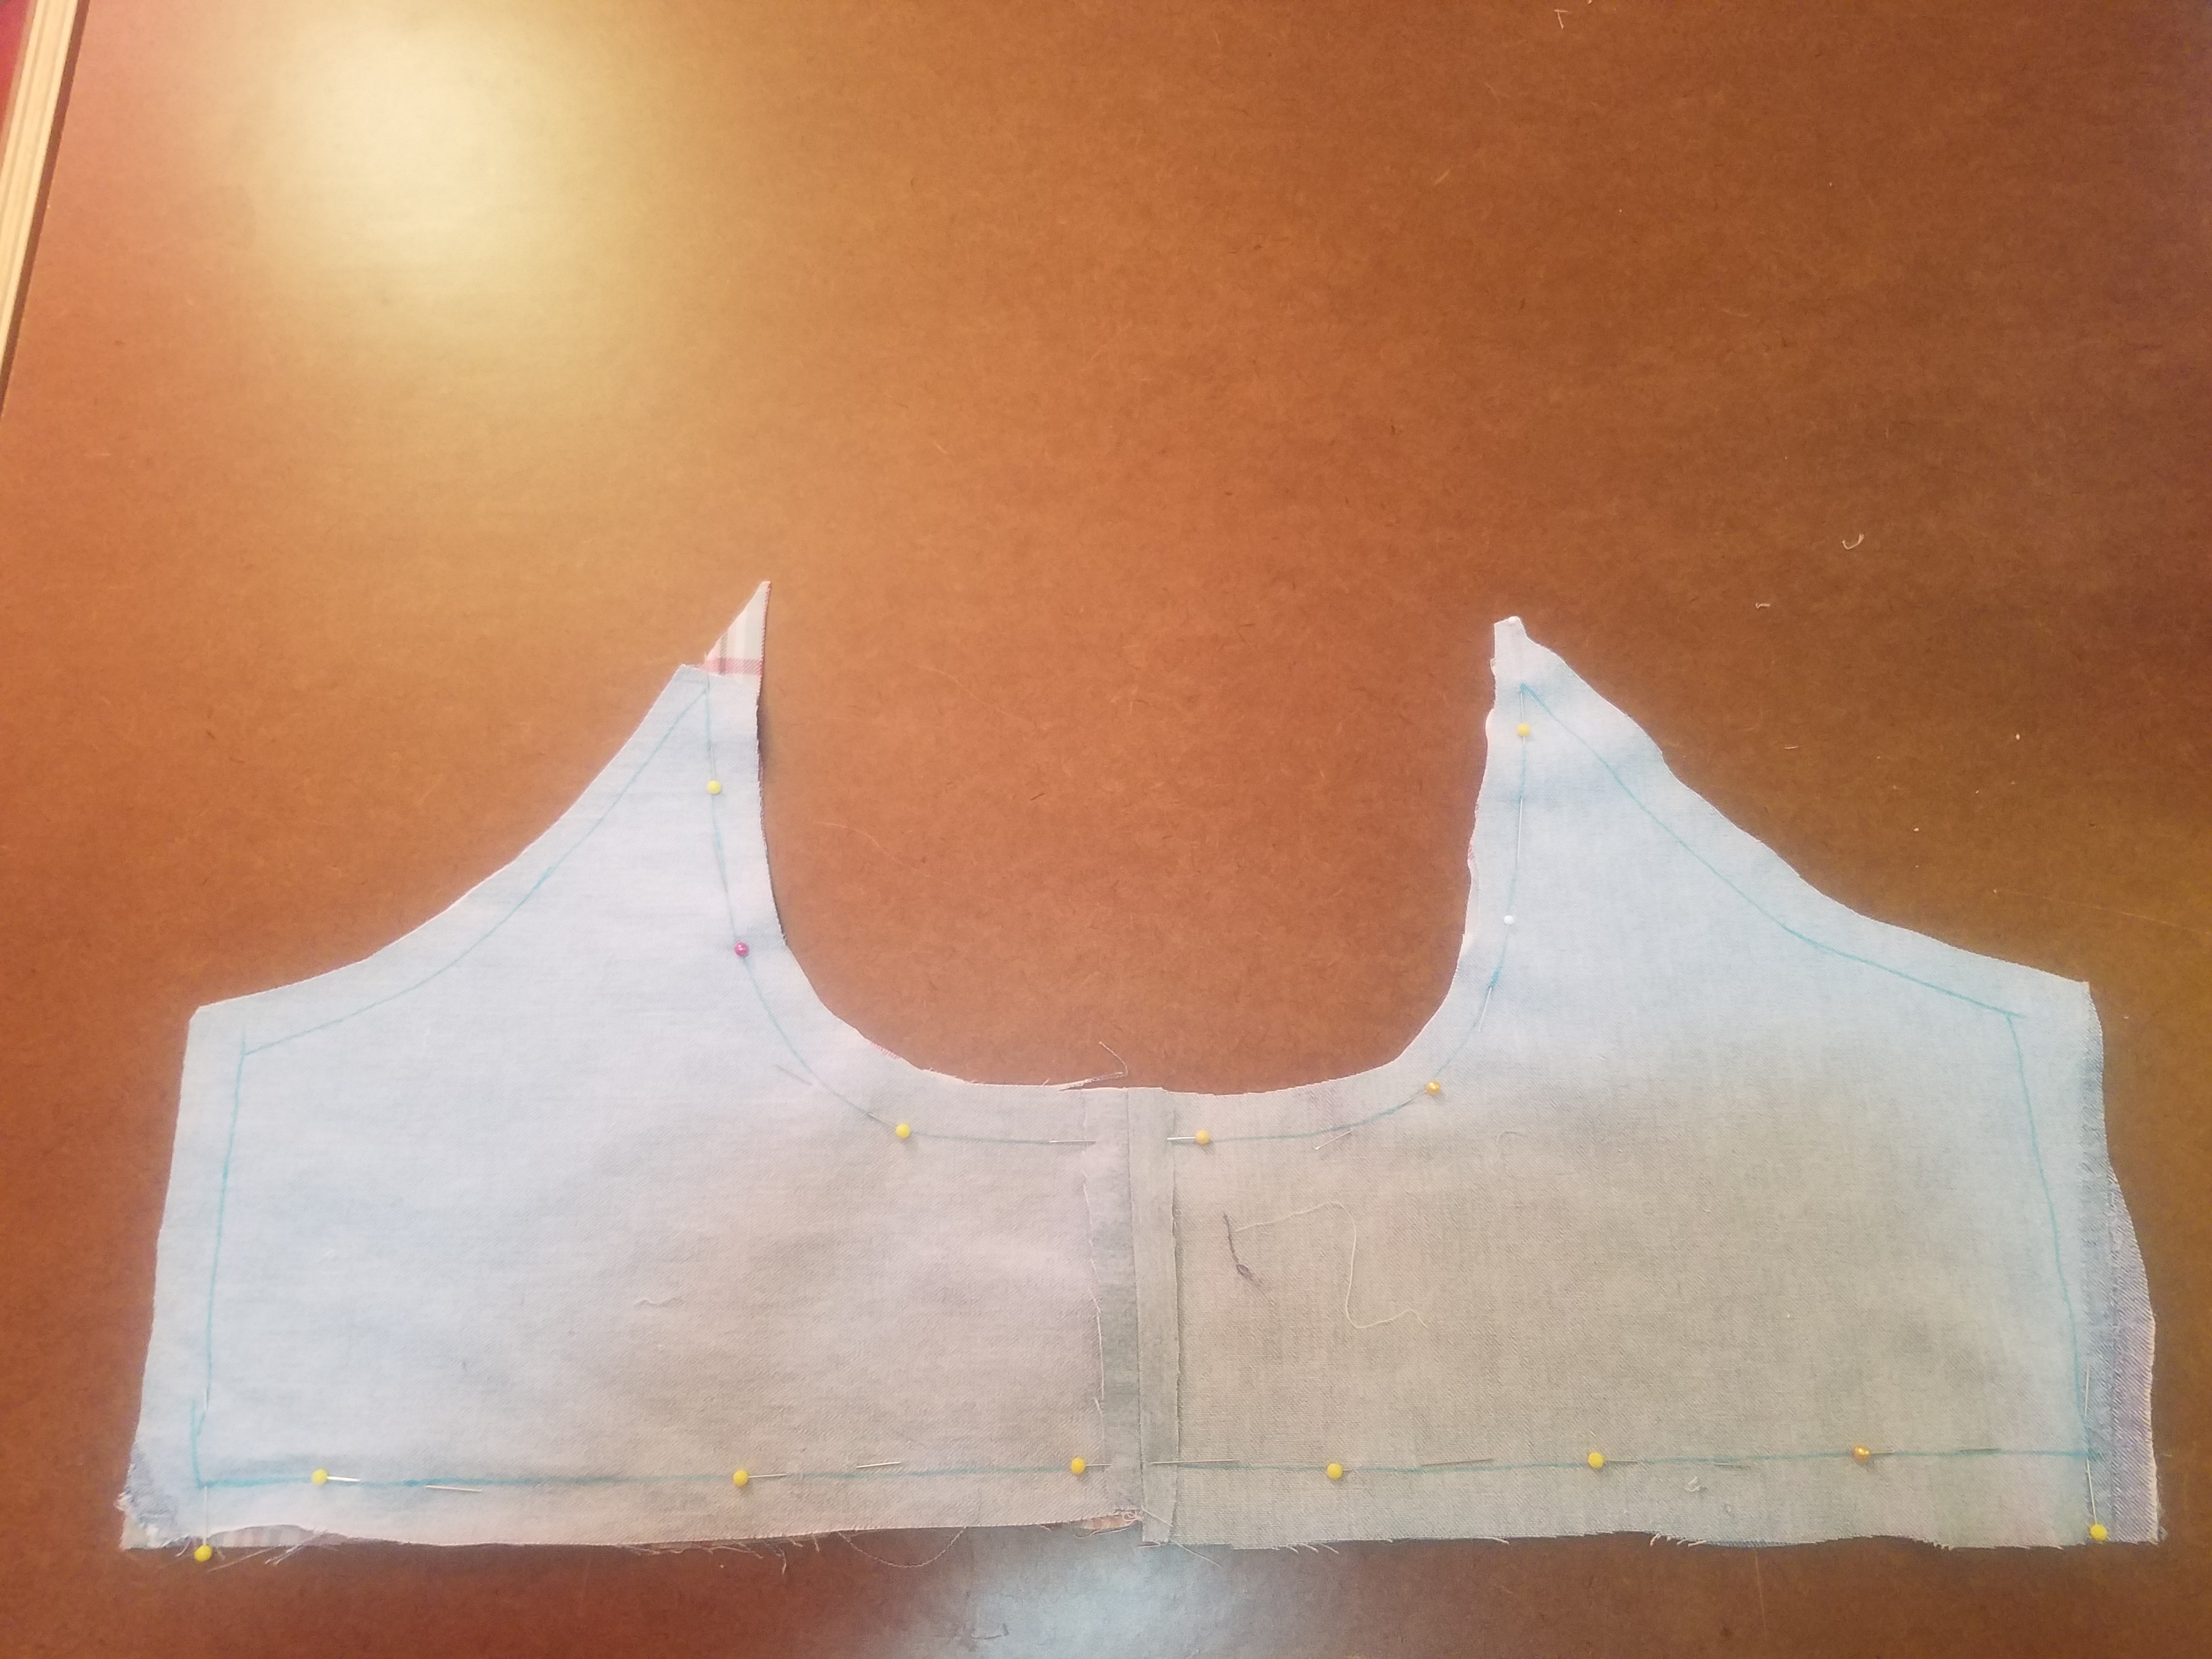
Now we are going to layout the center back piece. I folded the striped shirt in half matching up the seams and pinning them together so that the fabric would not move while I was working with it. Next I traced around the pattern providing me with a stitch line. Then I determined my seam allowance size and traced around the pattern again.
Once I had everything traced and I knew my patterns would fit on the button up shirt I cut out the six patterns, four center and two back pieces. Next I serged around each pattern piece to help the up-cycled stylish top last long term.
Sleeve Pattern Pieces
I knew that the sleeves would be cut out of the current sleeve therefore I decided to seam rip the under arm seam of the stripe button up shirt’s sleeve. This would help provide me with as much material possible. If you know that your sleeve pattern will easily fit then it is much faster to cut away the old stitching and serging.
My sleeve pattern was in two parts that would be sewn together on the under sleeve and down the center where the twist would happen. I also decided to completely line the sleeve with the contrasting / lower fabric to easily finish off the edges. After tracing stitch line and cut line I cut out the 8 sleeve pattern pieces.
Lets Start Sewing
Sleeve
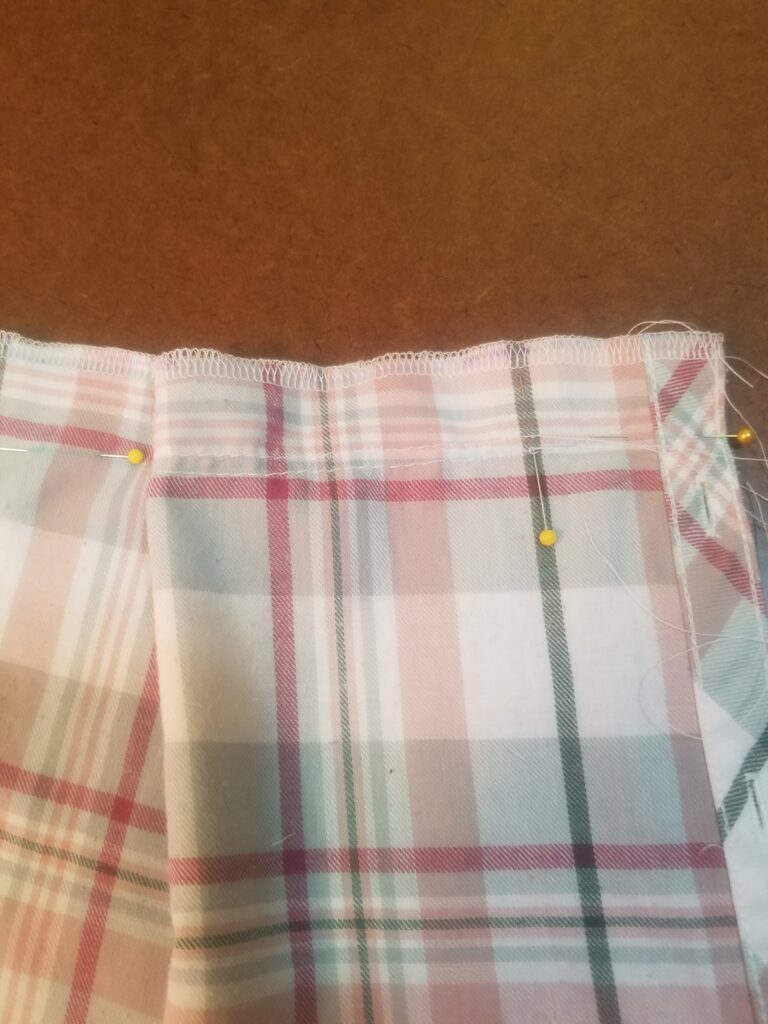
I started by sewing together the center line creating 4 sleeve patterns. Next I wanted to finish the hem of the sleeve as well as the cold shoulder cut out. I did this by bagging out the two edges through the arms eye. Don’t forget to clip your curve before you turn it rights side out to help the curve lay as flat as possible. Give the two seam a really good press with your iron. Then I matched up the hem seam and sewed the under arm seam to completely incase and finish the sleeve. Finally I carefully serged the arms eye to help create a long lasting upcycled top.
Top front
Now we are going to put together the bodice of the upcycled shirt. First put in your gathering stitches. Line up the notches of the bodice front top to the bodice front bottom. Sew the top to the bottom.

After double check that the buttons and button holes still line up for the closure.
Top Back
Sew the top back to the bottom back and press open the seam then down. Next sew in the back contouring darts. Sew up the side and shoulder seams so that the shirt can be test fit. Now we get to test fit the shirt and make sure it fits the way you desire. You can still easily make alterations by taking in or letting out at the side seams. Once you are happy with the fit, if you so choose, you can trim out any extra seam allowance.
Finishing the Garment

Now it is time for the finishing touches of this up-cycled stylish top. Start with pinning the sleeve on matching up the seams and notches. Before sewing the sleeve on we are going to add some bias to the top part of the arms eye. Sew the sleeve and bias onto the shirt and press to the inside. Now you can finish sewing the bias tape down creating a clean incased edge. Repeat these steps on the other sleeve.
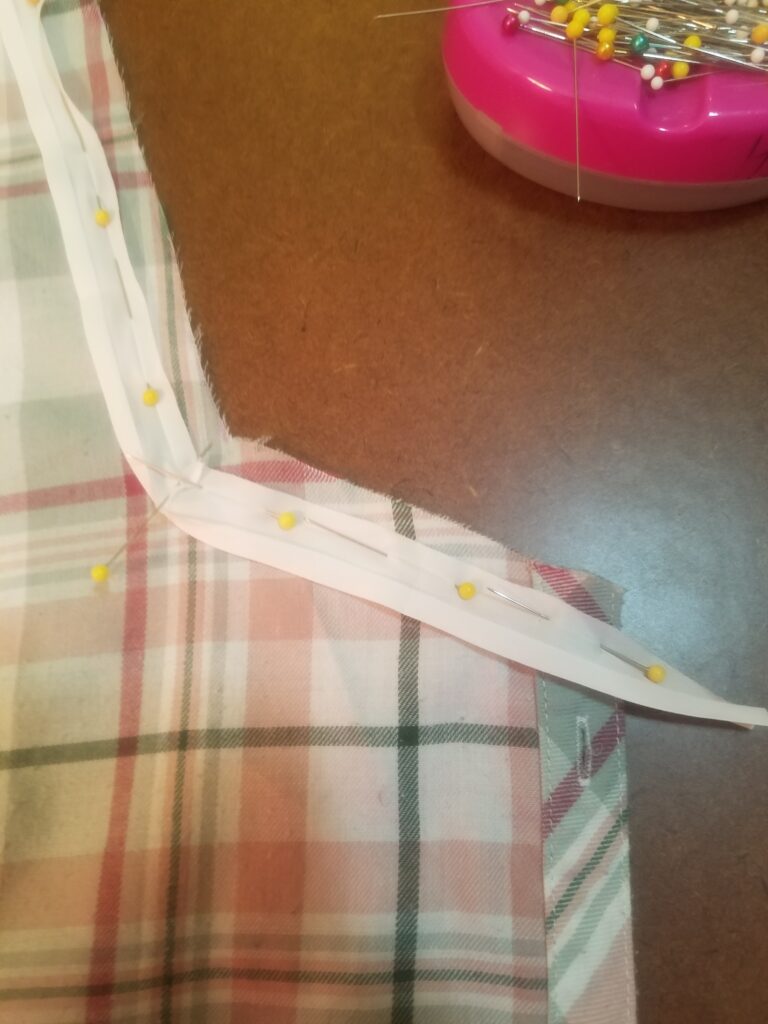
Next we are going to finish the neck line in the same way as the arms eye. Pin on the bias on the stitch line, sew and press. Turn the bias to the inside and top stitch it down. I choose to use a premade bias tape because I did not have enough left over pieces of the button up shirt to easily create my own bias tape or facing pieces.
The final touch is to hem the shirt. I chose to turn up a single time and top stitch all the way around. Another way that to hem the bottom would be turning the fabric twice which would encase all the raw edges and in known as a turn-turn hem.
Final Product Pictures
Now it is time to put on your new up-cycled stylish top and show it of to your friends.


Want my Illustrator Apparel Patterning Key Commands and Useful Charts?
See the tools and charts i always use when patterning in Adobe Illustrator!!!