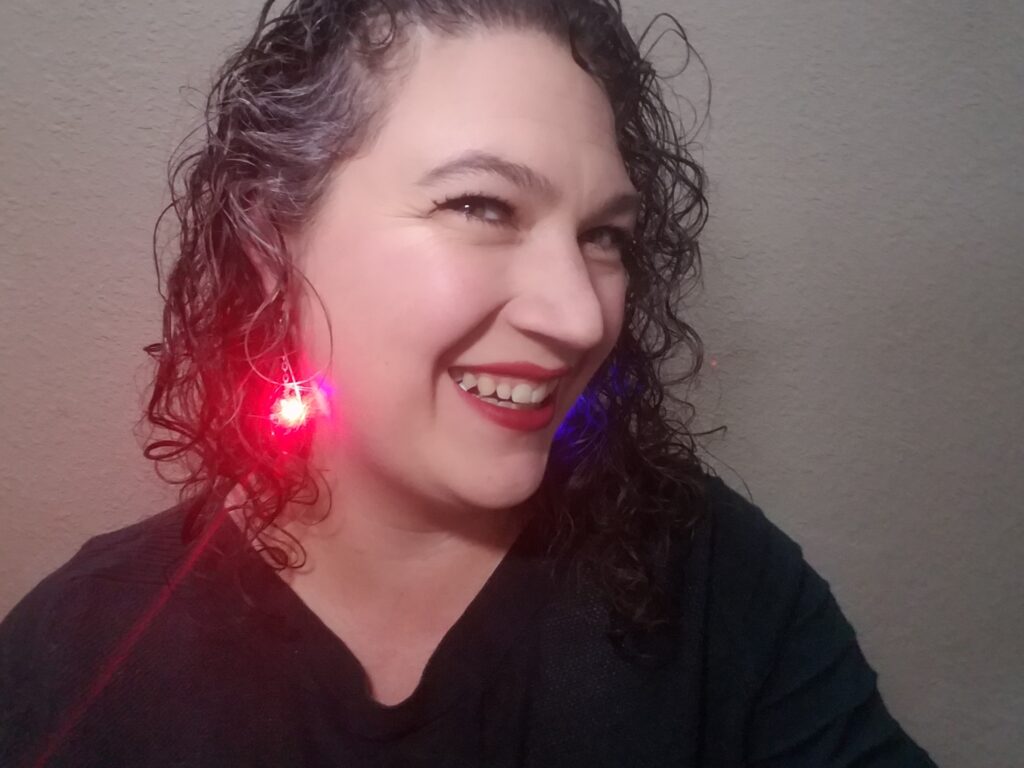
Light up jewelry is so much fun and I love it. I find it fun to wear and even more fun to figure out how to build. The designs inspiration come from everywhere and everything. You can find a few different store bought button battery cases one of which I will be using in this project. I am currently working on 3D printing my own that will be more integrated into the piece of jewelry. Lets get started creating your own light up earrings lets get started.
Gather you materials
- Earring hooks (2)
- 5 inches Jewelry chain
- Oblong hoops (2)
- Crimp cords (2)
- Button Battery case for a 1212 button battery (2)
- 1212 button batteries (2)
- LED (2) (I choose a RGB fast color changing LED)
Tools needed
- Soldering Iron and solder
- 2 needle nose pillars
- Tweezers
- Third arm
- Super Glue
- Sand paper
Prepping the Battery Case
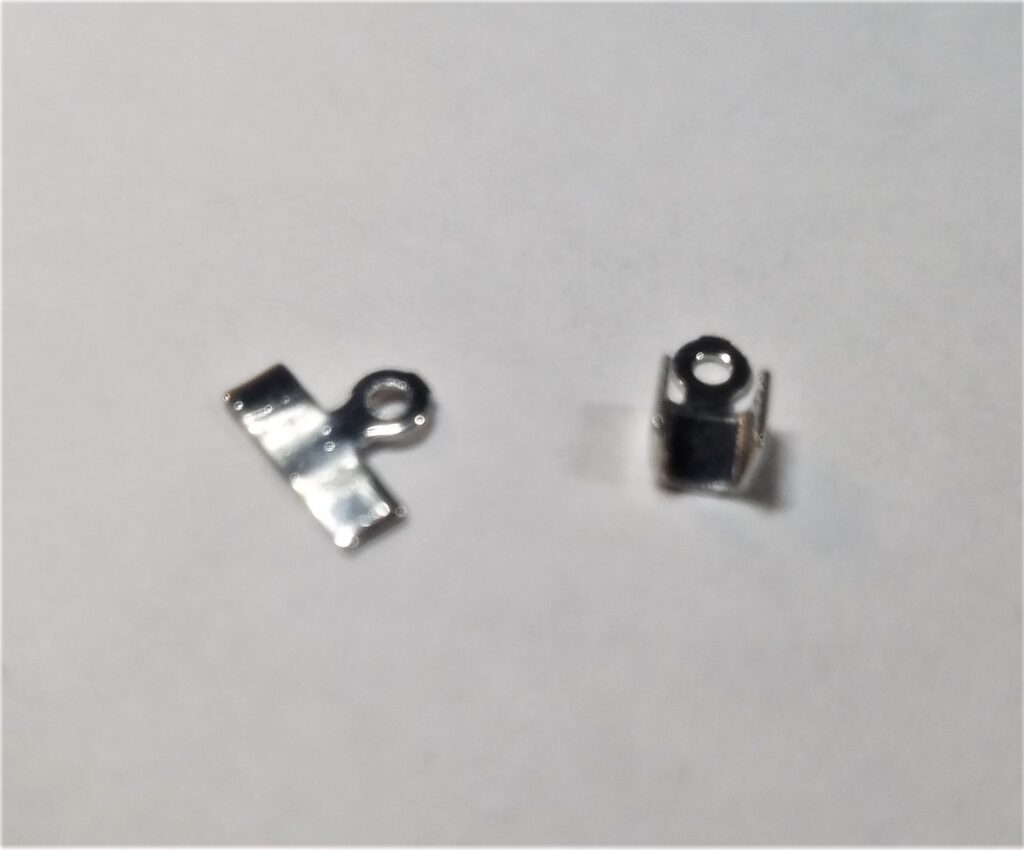
First we are going to flatten out the two crimp cords. These will be use to attach the button battery case to the earring. Next we are going to rough up the back side of the button battery case with some sand paper. We don’t need to totally sand down the back side only rough it up. This will make it easier to glue on the crimp cord so that the battery case can be attached to the hoop.
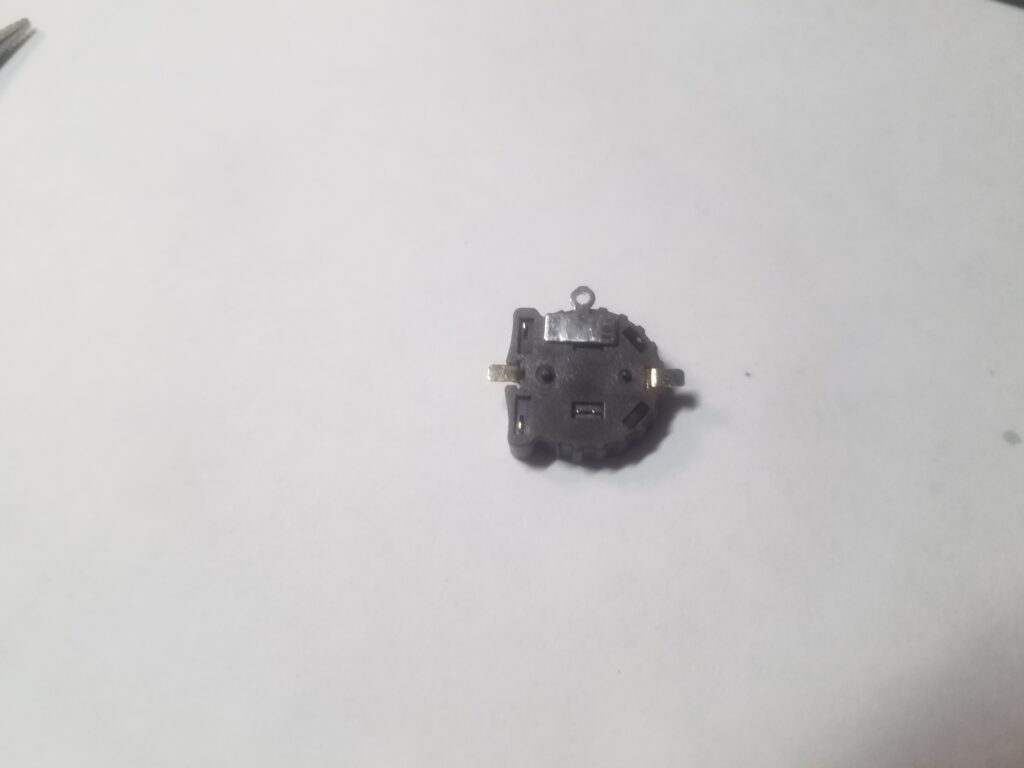
We are now going to glue on the flattened out crimp cord onto the back of the button battery case. I used super glue to attach the metal piece to the plastic battery case.
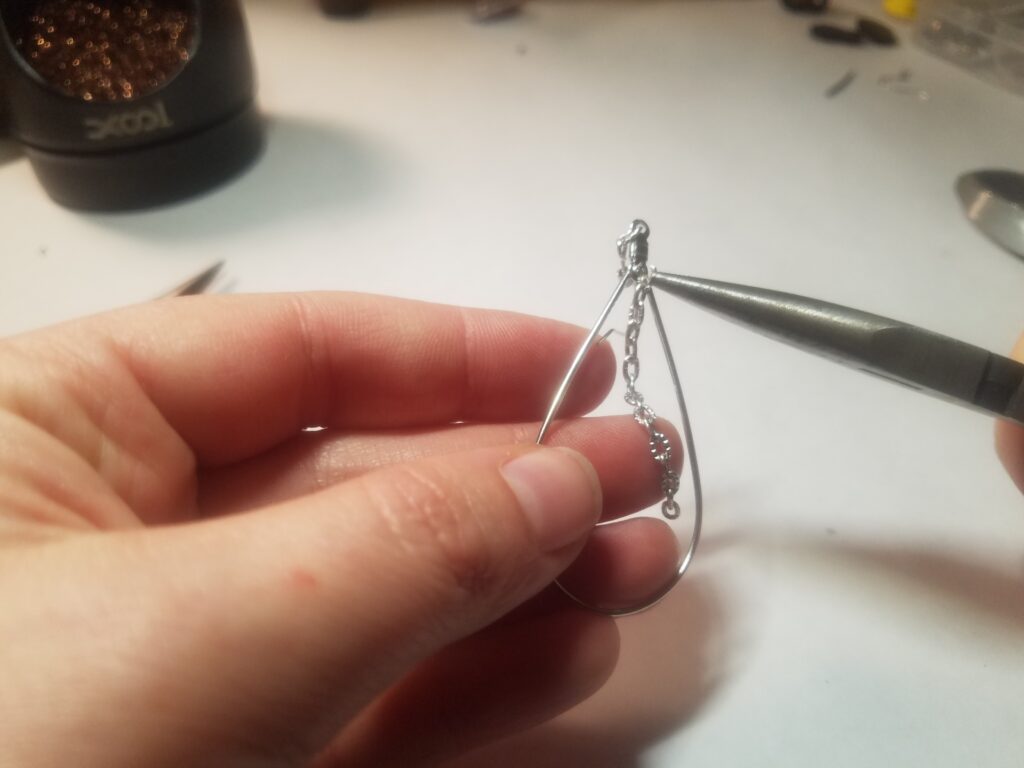
While we wait for the super glue to dry lets get the rest of the earring put together. I started with attaching the earring hook to the top of both of the oblong hoops. Next I took the five inches of chain and broke it into two lengths. I attached the length of chain to the under loop of the oblong hoops. Later we will attach the other end of chain to the button battery.
Prepping the LED for the Light Up Earrings
Now we are going to prep the LED. Before you start make sure to test the led with a battery. Also make sure to note which leg is positive and which is negative so that you solder the correct leg to the correct lead.

There are a few different ways to attach the led to the leads on the button battery case. I like to make a swirl pattern instead of cutting the leads off to length. Take the needle-nose pliers and the end of the lead and twist inward. I purposely make the positive and negative sides slightly different so that I solder each side to the correct lead. It is difficult to make both LEDs look exactly the same, but I try hard to do so.
Soldering the LED
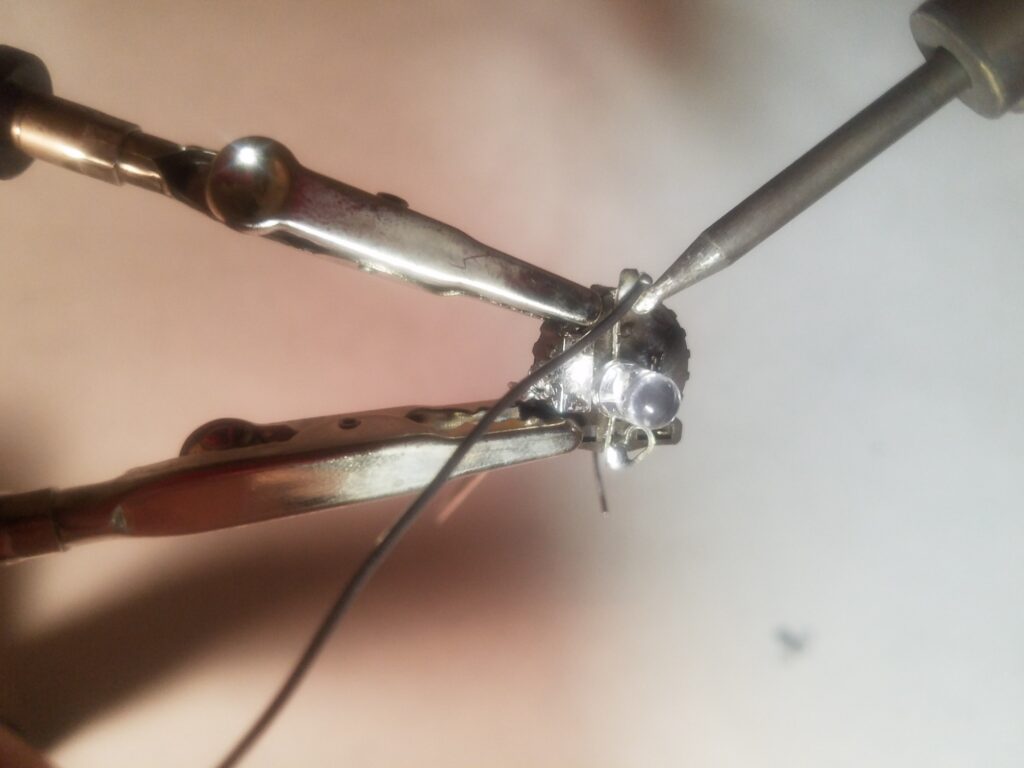
It is finally time to solder the LED to the button case. Double check that the super glue is completely dry before starting. Stabilize the LED and battery case by using the third hand. After soldering the positive to the positive and the negative to the negative you are ready to test the LED.
Finishing touches for the Light Up Earrings
The last thing left to do is attach the other side of the chain to the battery case. Double check that you are slipping the ring on so that the battery is facing to the rear while the earring is stationary. This can not be a perfect science because chains move around and will not be perfect all the time. Making sure the battery is towards the back will make you happier in the long run. Now that you have finished creating your own light up earrings its time to show them off!!
Now it is time to put in some batteries and test the earring out!