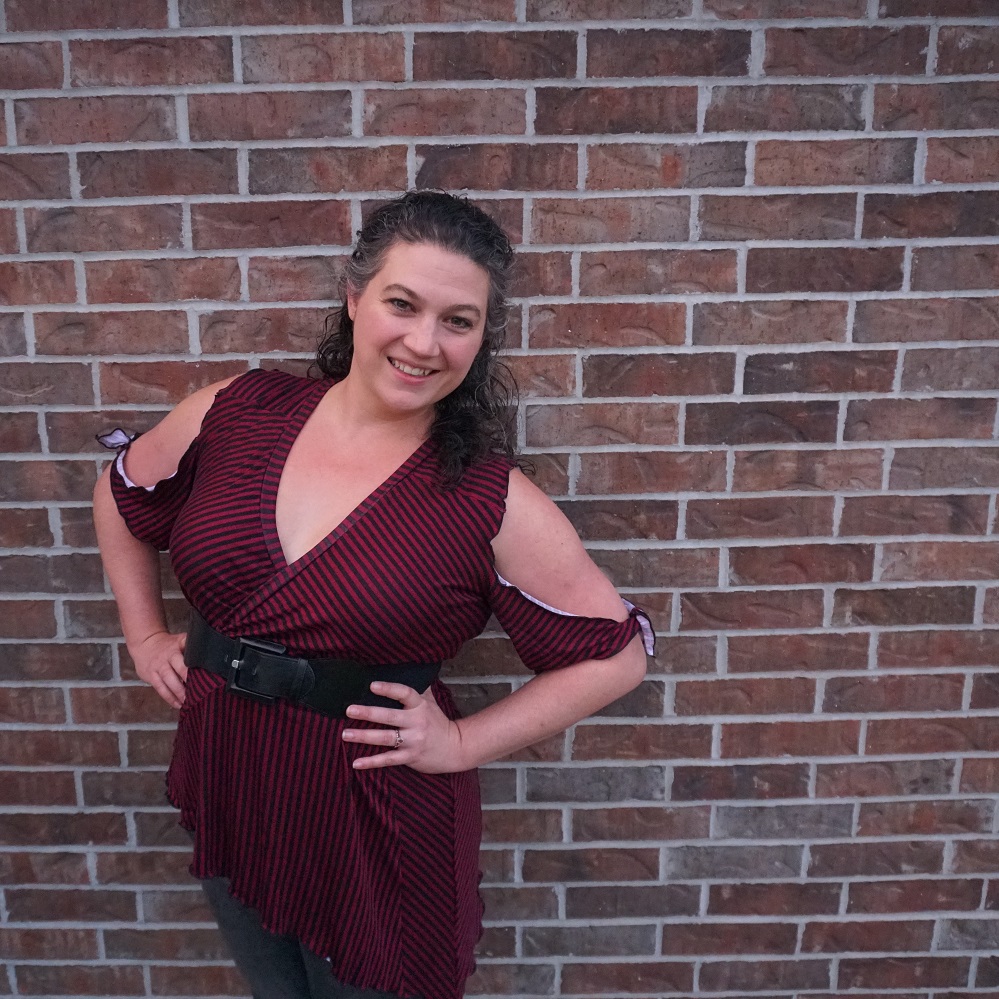
With a little creativity, it’s easy to make your own striped knit shirt. First, cut apart the pattern so you have several pieces – Then change which way the stripes go on different pieces by rotating them and layering as needed for a unique look! Making patterns and creating designs is a fun activity that has endless possibilities. Let’s get started on this new shirt!!!
Gather your Materials
- Pattern
- Fashion Fabric
- Thread
- Scissors
- Ruler
- Sewing Machine / serger
- Regular sewing foot
Cutting out the Striped Knit Shirt
First, we are going to lay out the fabric and the pattern pieces. This shirt is constructed in a way I could only cut out one pattern piece at a time. Also because the grain of each piece was different laying all the pieces out in the most effective way became a huge puzzle!!! It took a bit of Tetris but I finally got all my patterns laid out in the most effective way!!!
Next, I pinned the pattern pieces down and cut out each piece.
Layout your pieces in the form of the shirt. There were so many pieces I found this very helpful when constructing. I could grab two pieces serge them together and then grab the next piece and add on!!!
Constructing the Striped Knit Shirt
Begin by sewing the shoulders to the bust and the back three upper pieces together. Connect the patterns at the shoulder
Next comes binding the neckline. I used a folded-over rectangle serged onto the neckline. If you slightly stretch the binding I find it helps control the neckline.
Time to sew the bottom half of the shirt together. Lining up all the pieces on the cutting table and grabbing them one by one to add on ensured that I did not sew the wrong pieces on in the wrong place or upside down. No one wants to seam rip a serged seam!!!
Next, it is time to sew the bottom half of the shirt to the top half. I used pins pinned a good distance away so that they could remain in the garment as I serged but I would never run the risk of hitting the pins.
Time to add on the sleeves. They are a cold shoulder design so there is very little to actually serge. There are a few different ways the armscye can be finished. I am choosing to use a pearl stitch around the entire sleeve and armscye. So once the sleeve is attached I do not continue around the armscye.
Final touches
Last is finishing all the edges. I chose to use a pearl edging stitch all the way around the sleeve, armscye, and hem. This would provide the garment with a cohesive look and give my edging a beautiful look.
Final Look of the Striped Knit Shirt

Did you miss how I patterned this fun new shirt in Adobe Illustrator? Check out how I did it here!!!
Want to begin your own adventure in Digital Apparel Patterning? Enroll now in my course Set up Adobe Illustrator for Apparel Patterning
Enjoyed this project? Make sure to check out some of these other similar projects. See how I patterned a Neckline Lace Closed shirt and how I built the same shirt.


One Reply to “How to Construct a Striped Knit Shirt”
Comments are closed.