Why I love Computer Apparel Patterning in Illustrator !
May 06, 2025 08:09 AM c.hadleydike
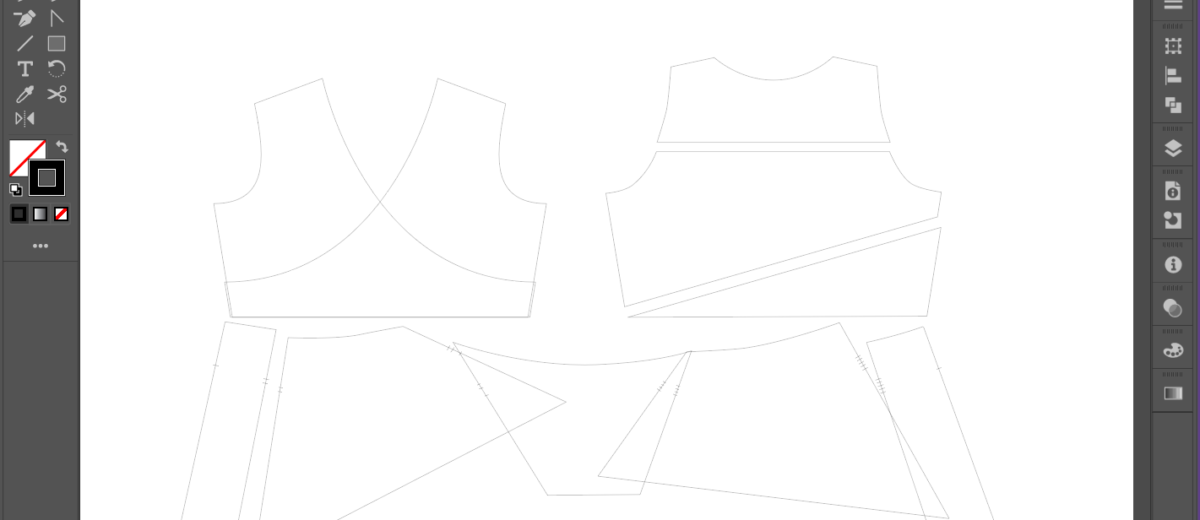
This week I am trying something new, not printing out my PDF pattern but using a Projector to cut out a Digital PDF sewing pattern!!! I have seen other people use these projectors and have been interested in trying one out, so let’s dive in!!!
Full Content Will Update soon.
Find this projector
You can find the link for this projector HERE.
VANKYO Leisure 470
Sewing Projectors
Sewing Projectors
Use the Coupon code: CREATIVEHADLEYDIKE to receive an extra 10% off!