Day 4
I love to be inspired by everyday items that I find in a store so when I saw these light-up snowflakes I knew I had to make a light-up snowflake necklace. It is great when you can incorporate something that is already wired into a design. Although sometimes building your wiring from scratch makes it easier to create exactly what you have designed. Let’s get started building this sparkling addition to your winter jewelry collection.
Gather you materials
- LED Snowflake battery powered lights
- Chain
- Decorative chain
- Lobster claws
- Crimp Cords (2)
- Clear Heat Shrink
- Battery pack that holds 2 Button Batteries
- CR 3232 Button Batteries
- Alligator clip wires
- Needle Nose pliers (2)
- Glue for plastic to metal
- Soldering Iron
- Heat Gun
- Third Arm
Designing the Layout
The design of the necklace is a fun part of the process. I love to play around with a few different layouts before I settle on one. I tested out trying only one snowflake all the way up to playing around with having five. Do you want your necklace to hang low or high and tight? Looking at many different layouts can even inspire you to create two final necklaces.

I settled on using three snowflakes, one hanging lower than the other two. To help me come up with this and many other designs I used a neck form and straight pins.
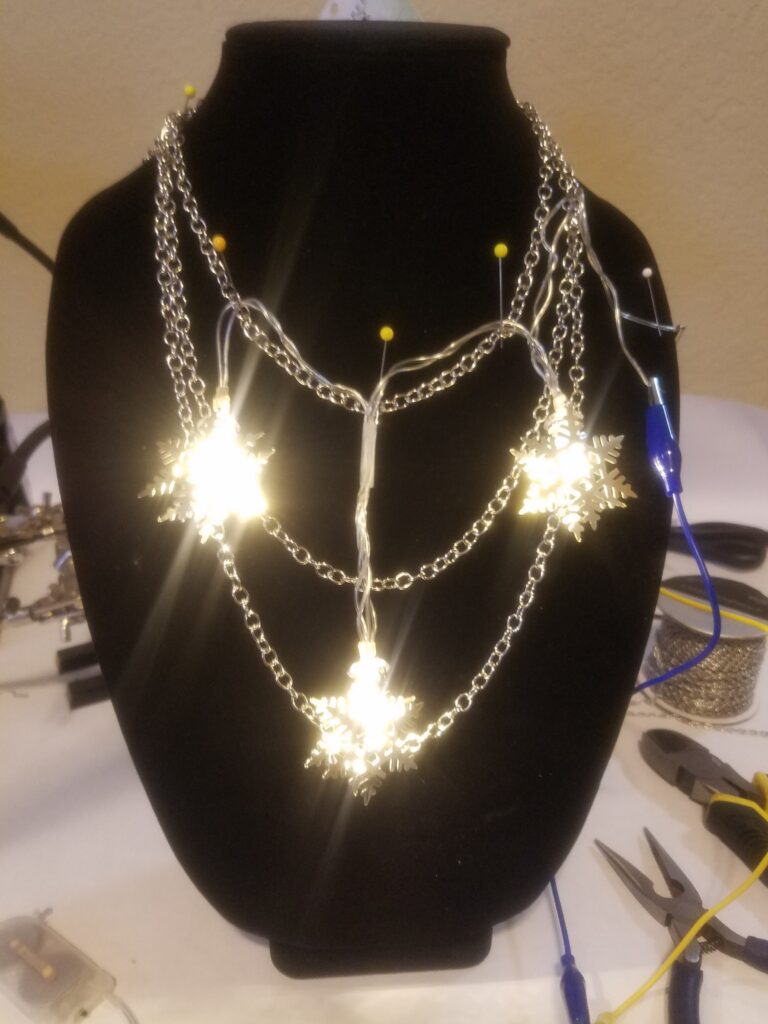
It is always best to check the designs with the LED turned on as well as off. This will make sure you are happy with the final design.
Building the Light-up Snowflake Necklace
Prepping the battery case
I am going to start out by prepping the battery pack. I will be using the battery pack at the closure in the back. This will help hide the battery pack, especially if you have long hair.
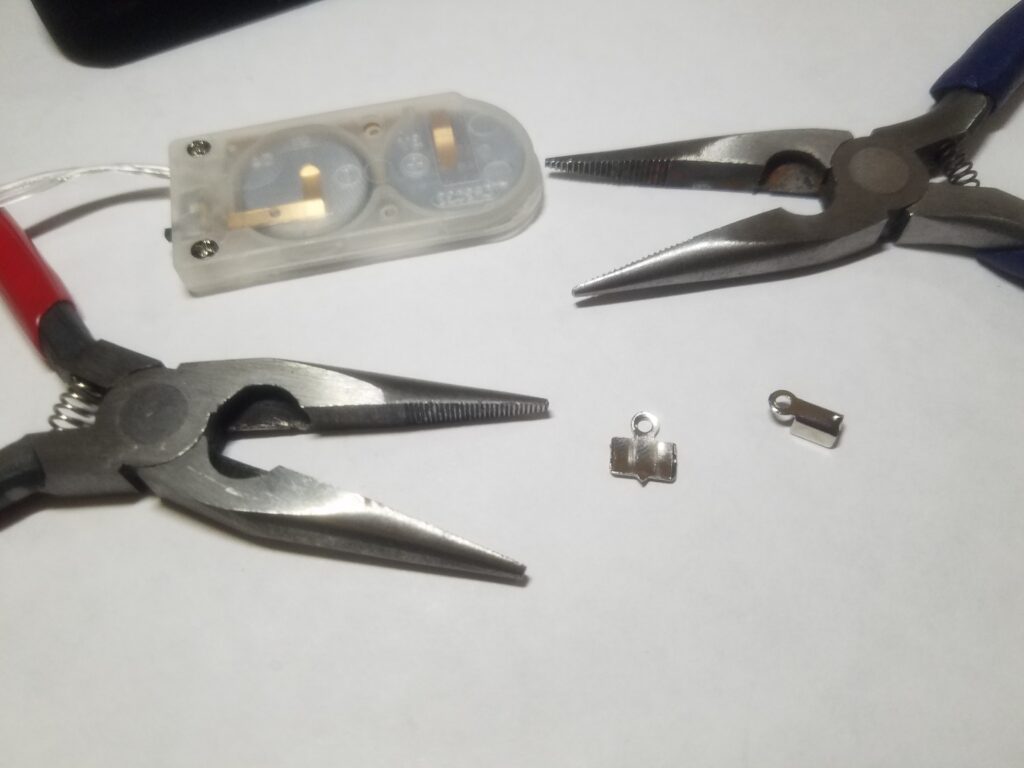
First, you need to flatten out the crimp cords.
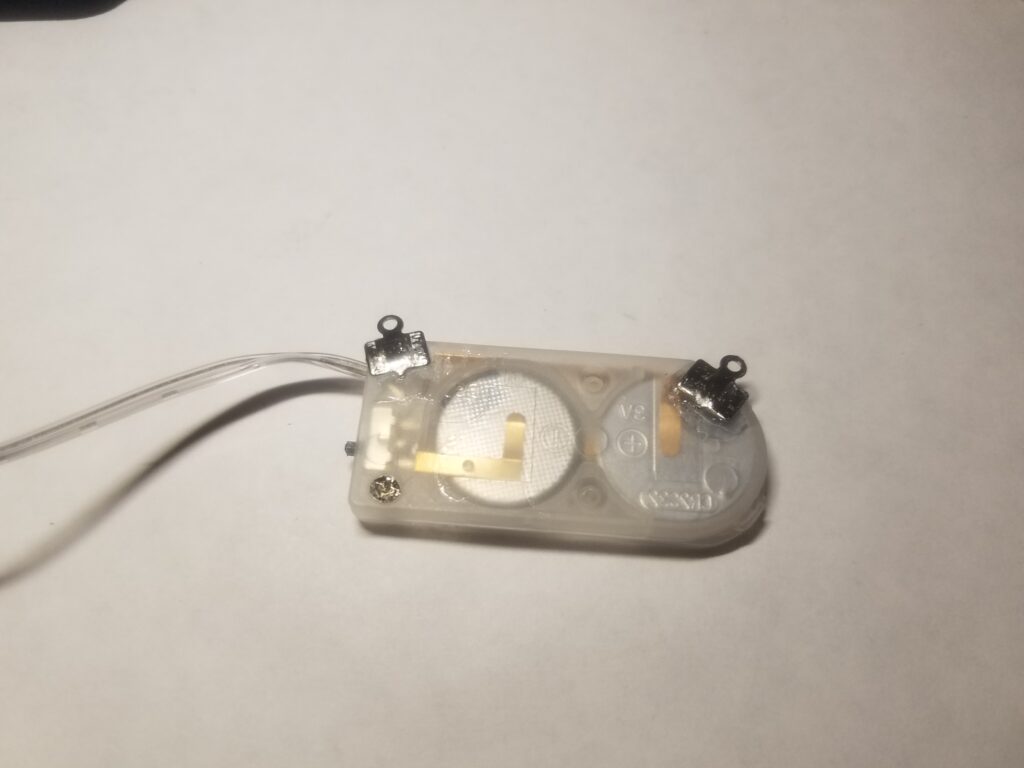
Next, we will be gluing the flattened-out crimp cords onto the battery pack. Set this aside and let it dry.
Creating the basic chain layouts

Now we are going to move on to the necklace. Start by attaching the middle and lower chains to the top chain. I counted from the back ends on either side 14 chain links. I attached the two lengths at the same point.
Adding on the snowflake LED’s
Here is the fun part… adding on the LED snowflakes. I started by attaching the decorative chain to the top of the snowflake. Then attach the other end of the decorative chain to the necklace.

To help control the wires I added a chain that went around the wires and connected to the link in between each decorative chain.
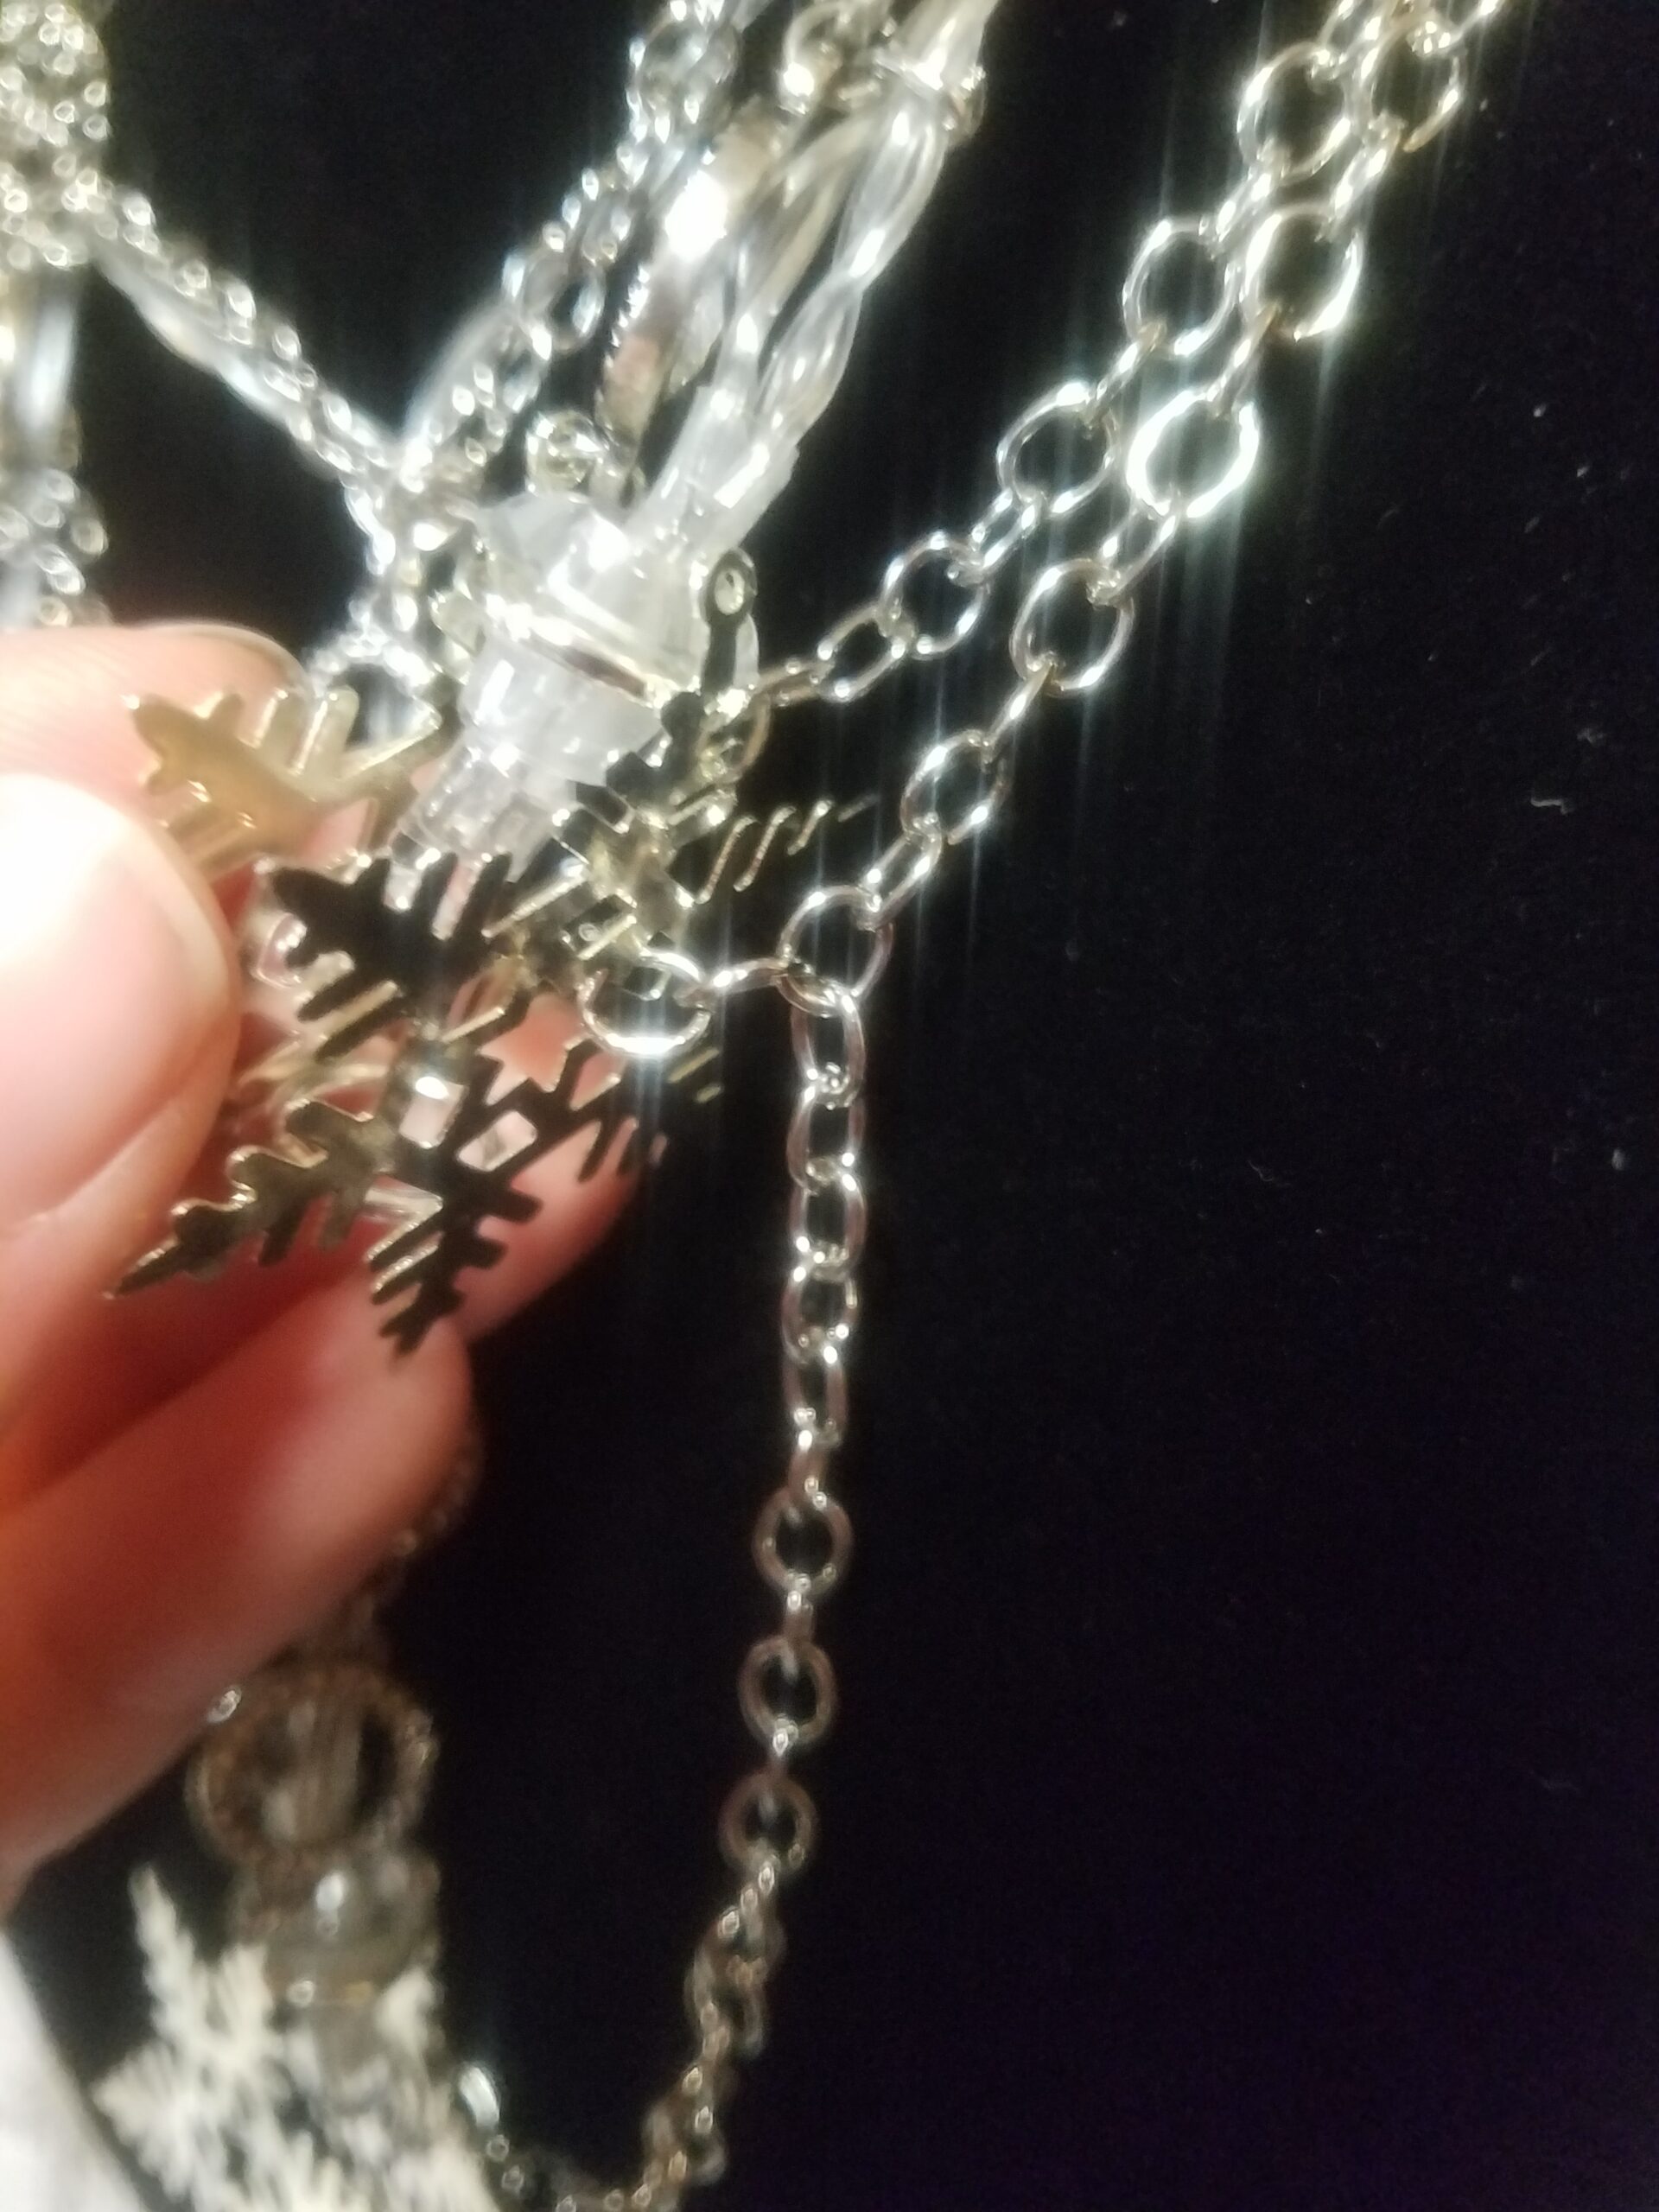
Next, I also wanted to stabilize the snowflake to the bottom chain. I achieved this by first feeding a chain through the metal detailing of the snowflake and then through a chain-link of the longest loop. This helps keep the snowflake always facing forward as well as keeping it from swinging too much and getting caught.
I repeated these steps with the other two shorter snowflakes to contain their wires and stabilize them to the necklace.
After all the snowflakes were attached I went back and secured the wire. I achieved this by encasing the wire in an extra chain and attaching it to the original loops. This helped the wire look integrated with the necklace and not an afterthought that was applied on top.
Attaching the Button Battery Case

Now that the crimp cords are firmly attached to the button battery case we can add it to the back. I firmly attached the left side of the necklace to the crimp loop. I did this because I am right-handed and can more easily work with a lobster claw in my right hand. Next, I added the lobster claw to the right side of the chain connecting to the right side of the battery case using one chain link.
Soldering the wire for the Light-up Snowflake Necklace
Now that you have the snowflakes attached as well as the battery you can easily measure the wire. By waiting until now to fully solder the wire makes it easy to know that you have the correct length. No one likes to cut and solder twice. Double-check which wire needs to go to which wire. You must put the positive to the positive and the negative to the negative or else the LED’s with not light up.
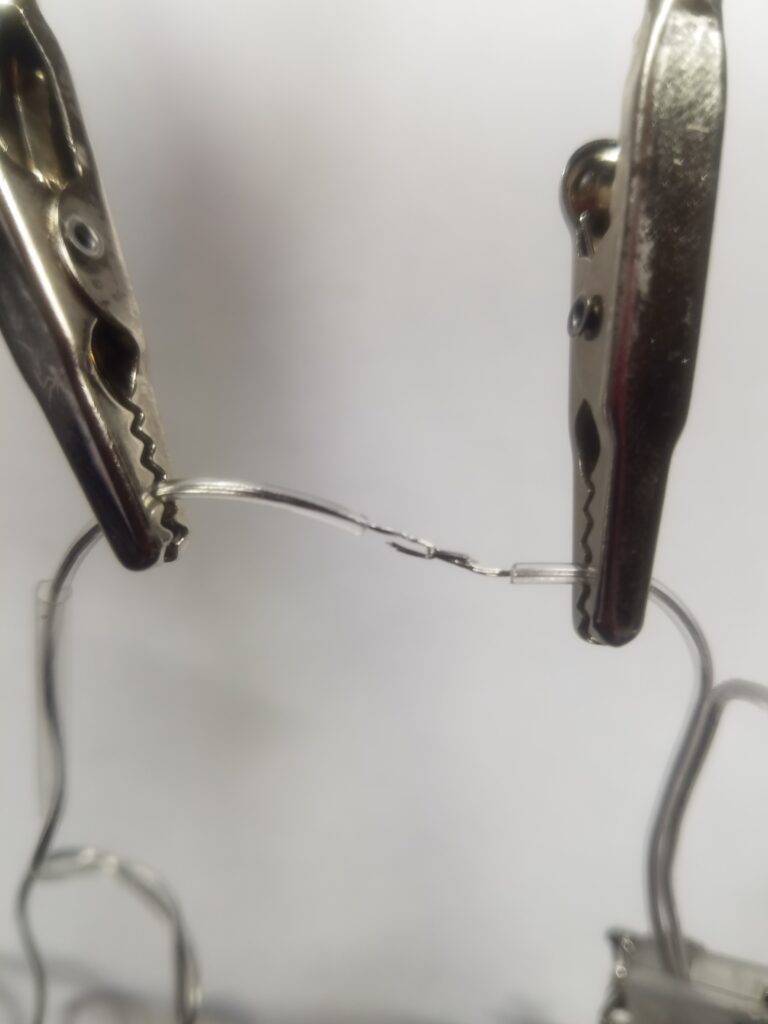
Once your wire is cut to the correct length it is time to strip the coding off to get to the actual wire. Don’t forget to slip on your heat shrink now before you solder anything together. If you don’t you will have to undo the solder. Next form the two sides of the wire into a hook shape so it is easier to hook them together. Hook them together and pinch down so that they won’t easily come apart.
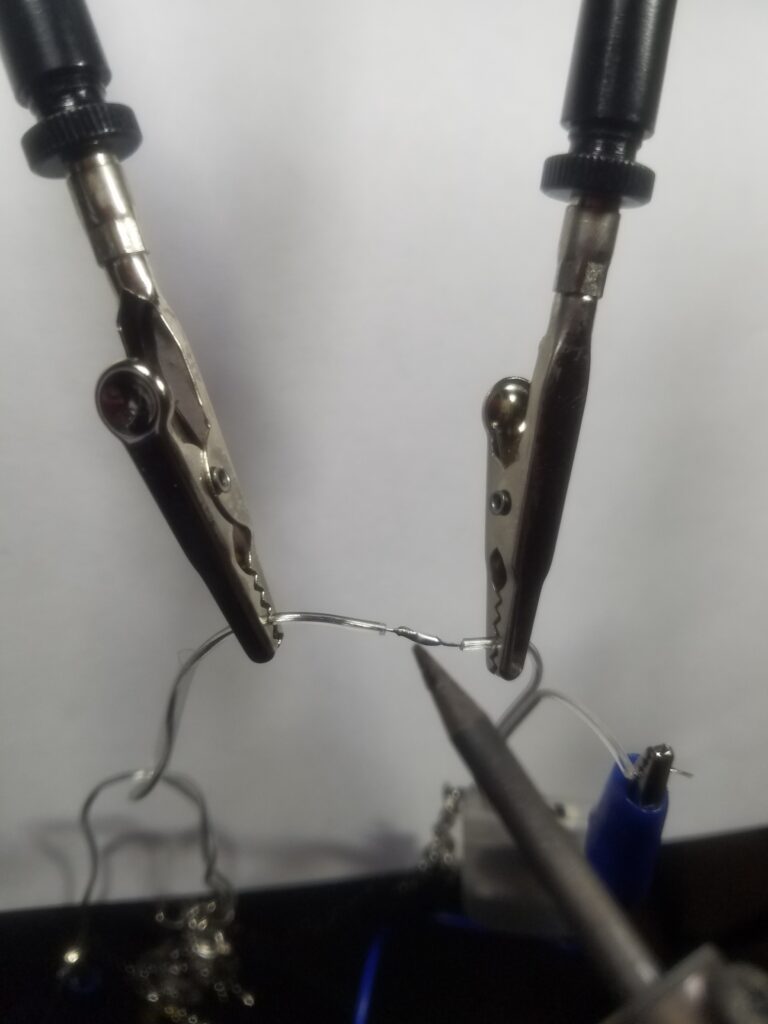
Now we get to solder them together! Take your soldering iron and heat up the connection of the wires to help the solder want to easily flow onto the wires. Once the wires are warm place the solder on the wires and lightly touch you soldering iron to the solder. After the solder starts flowing onto the wires you can pull away from the solder and finish manipulating the solder on your wires. I strive to make the connection point look clean and even. Sometimes I am able to achieve this easier than others.
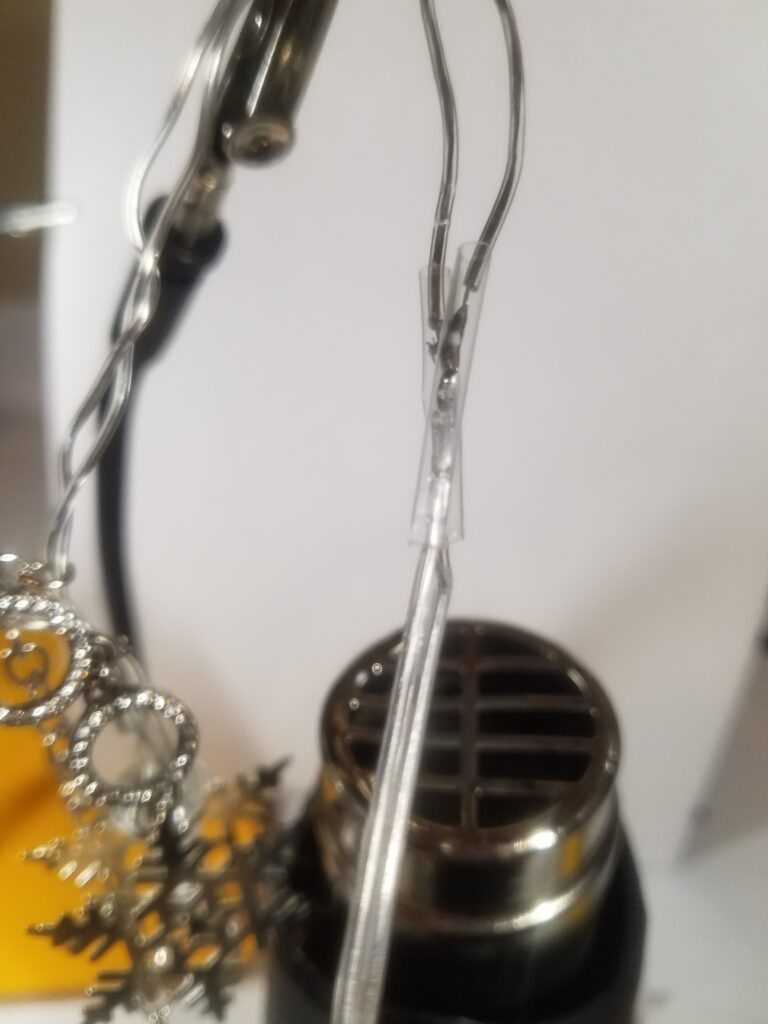
Now that you have your two wires solder together it is important to turn your battery pack on and make sure that the connection points are good. Once you have double-checked that everything is working slip the heat shrink over the solder point, turn on the heat gun and shrink it!!! I like to use the marshmallow technique, with a little lower temperature slowly twist the heat shrink so that it evenly shrinks into the correct placement.
Finial detailing’s of the Light-up Snowflake Necklace
I went back over the snowflake necklace and added a few more chain links to help maintain the wire placement. l also added the decorative chain over the junction where all three hanging loops merged. Finally, it is time to try on your light-up snowflake necklace and see your beautiful creation.
Final Pictures of the Light-up Snowflake Necklace

Make sure to come back tomorrow for Day 5 of 25 days of Christmas!!! Did you miss yesterday’s post click here to see day 4.