Day 15
I have always thought the sight of Reindeers with their antlers tangled in a string of lights is a very funny image. Having your own unique Christmas shirt for a party is always fun!!! The easiest way to make sure of this is to make your own shirt using felt and create your own Reindeer Shirt with added lights!!! Let’s get creating!!!
Gather you Materials
- White long sleeved shirt
- Felt – Black, Brown, Tan, Red, Green, Blue, White, Gray/Tan
- Washable Fabric Glue
- Battery Powered LED string Lights
- Thread
- Sewing Machine
- Jingle bell or button
Create your Unique Reindeer Shirt
Pick out your felt colors and cut your patterns.

I find that visualizing the colors next to each other can help finalize the design. I had a few different shades of most of my colors and tried out different combinations before settling on these colors.
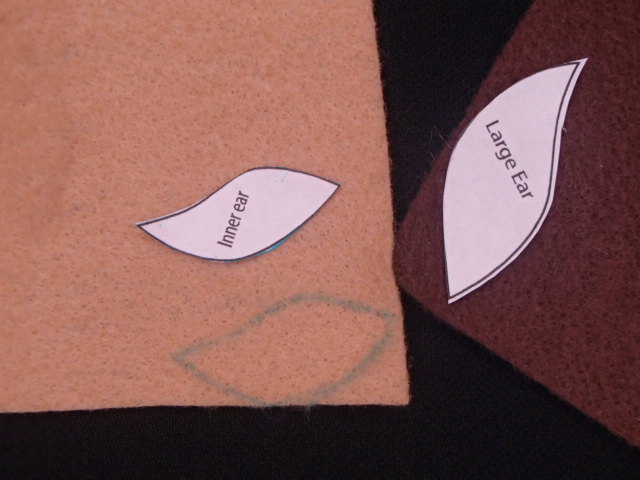
Next, I traced and cut out my patterns. You can find the pattern I created in illustrator below.

Doing a final layout helps visualize the final product before permanently attaching any of the pieces together.
Permanently attaching the pattern pieces
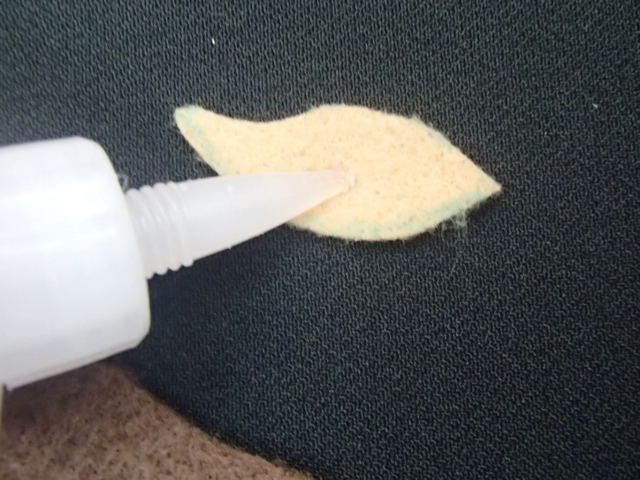
I started with gluing the under ear to the ear. I would allow the glue to dry before zig-zag stitching all the way around the smaller pattern piece to securely and permanently attach the two pieces together. Repeat these steps with the eyes.

Now it is time to attach all the pieces to the brown base of the reindeer. I started by attaching the scarf, then the hoofs, the eyes, and finally the nose.
Once all the pieces were attached and the glue had time to dry I zig-zag stitched around each piece to securely attach it to the brown. This also gave each piece some dimension and smoothed out the edges.
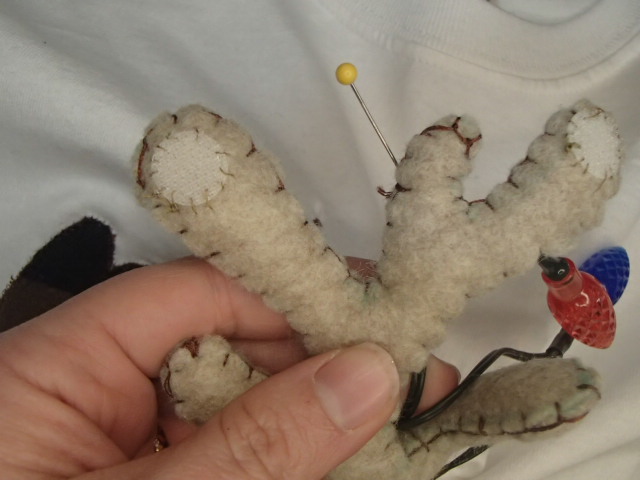
Making the antlers
I first designed the shirt to have the antlers sewn down to the shirt. After a had all the pieces sewn onto the brown base and I was mocking the reindeer onto the shirt with the LED’s and found I was not fully happy with the result. That is when inspiration hit and I decided to make the antlers 3-d and removable. This way I could really wrap the LEDs Around the antlers and add a fun bag the Reindeer could carry that contained the battery pack.

I started by blanket stitching around the antlers and stuffing each prong as I finished going around it. Stuffing as I finished making it easier because I would not be trying to stuff the very top of the antler by going through a very long narrow opening.

Gotta test them out yourself to make sure they are good antlers!!!
Adding the Reindeer to the Shirt

I started by pinning on the Reindeer to the shirt and trying it on. This will help me make sure I am happy with the placement before I permanently add it to the shirt.

Now that I am certain I am happy with the placement I am going to zig-zag stitch around the edges.
Attaching the Antlers
Now that I have the antlers removable I will need to add some Velcro to the shirt and antlers.
I started by sewing on two round dots of hard Velcro to the top two prongs of the antlers. Then I added a 2-inch long rectangle at the base.

Next, I laid the antlers onto the shirt where I thought they looked best and marked where the Velcro needed to be sewn onto the shirt. Then I straight-stitched around each piece to attach them to the shirt.
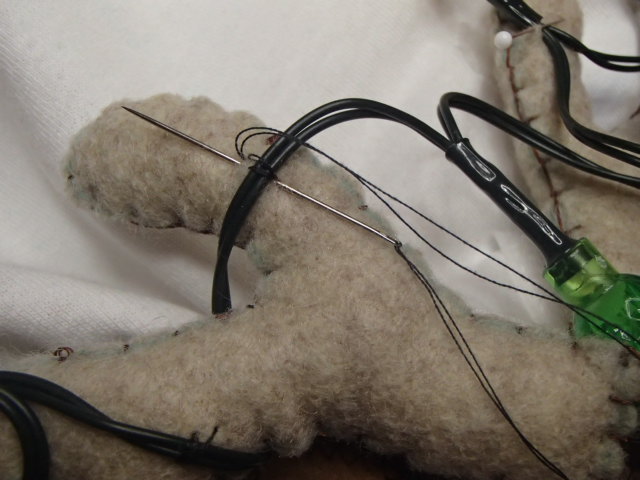
Finally, I attached the LEDs with small tacks all over the antlers. This would help the lights stay in place.
Adding the Santa Bag for the Battery Pack
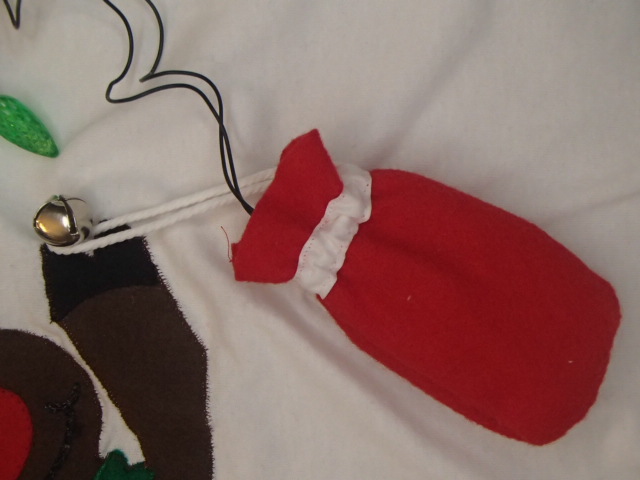
Having a Santa bag the Reindeer could carry to contain the battery pack I thought was a good way to conceal the pack. I decided to do this so that I would not have to cut and bind a hole in the shirt and I thought it would be cutter to have the reindeer carrying something.
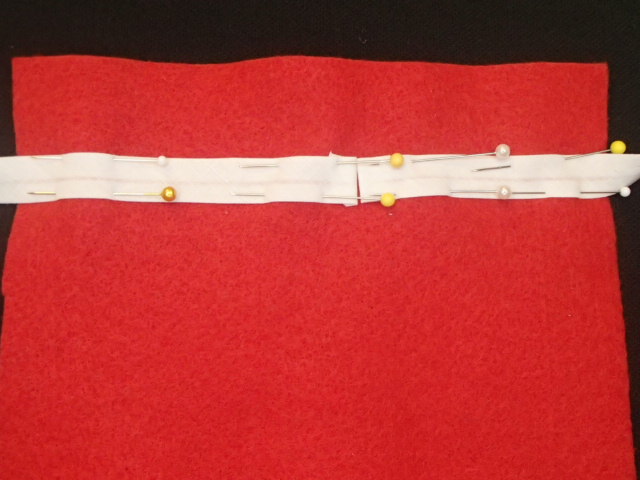
I created this bag out of a rectangle of red felt. Start by adding two pieces of white bias tape about an inch from the top. Turn back the edges in the center to create a finished look. This gap will be where the string comes out for the bag opening to tighten.
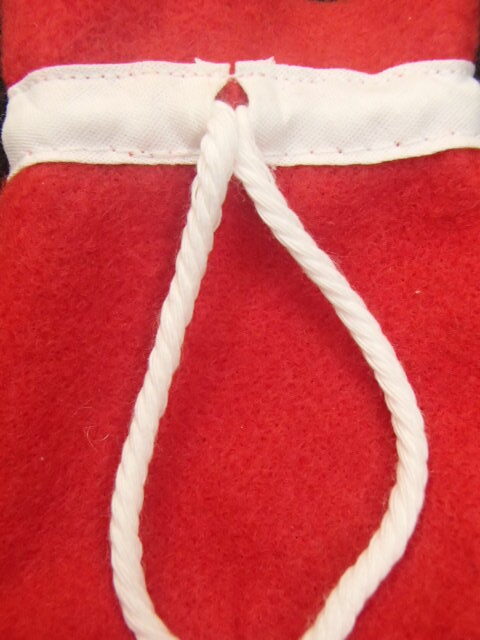
Now it is time to feed the string through the casing leaving the extra hanging out of the center gap you created.

Before you sew up the bag you will want to sew on the piece of Velcro that will be holding the bag onto the shirt. It is easier to sew the rectangle onto a flat piece than once it is already sewn into a bag.
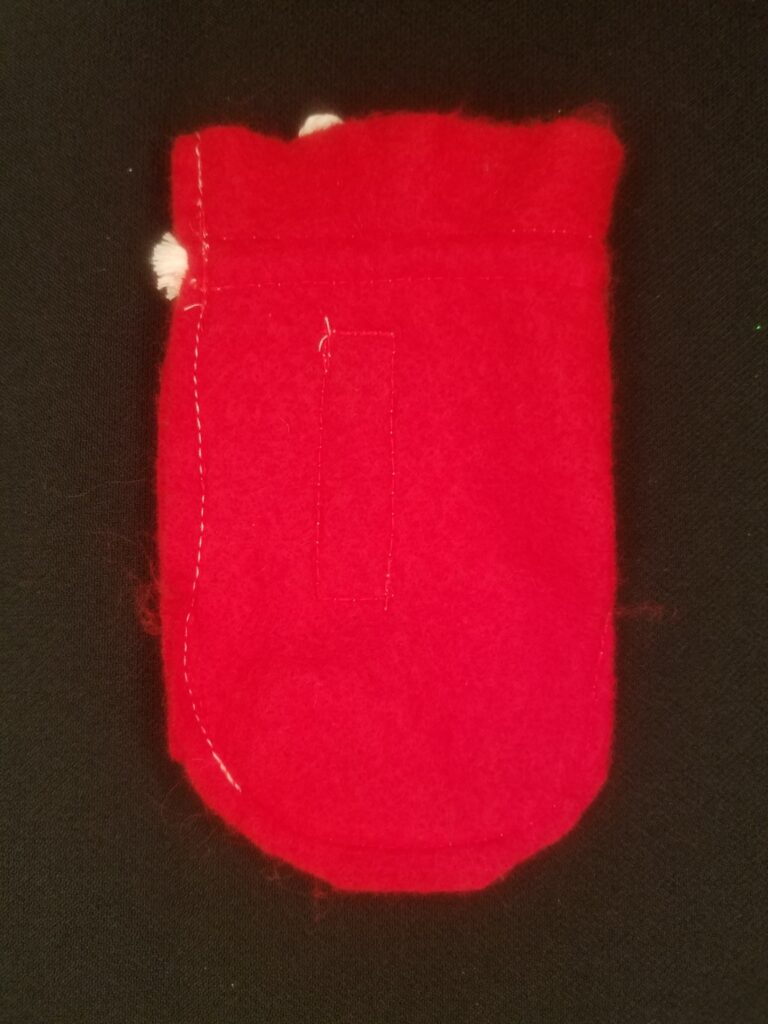
Time to sew up the bag. Stitch the bag up and make sure to do a backstitch over the strings so that they are strongly attached. Now flip it to the right side out and your bag is complete!!!
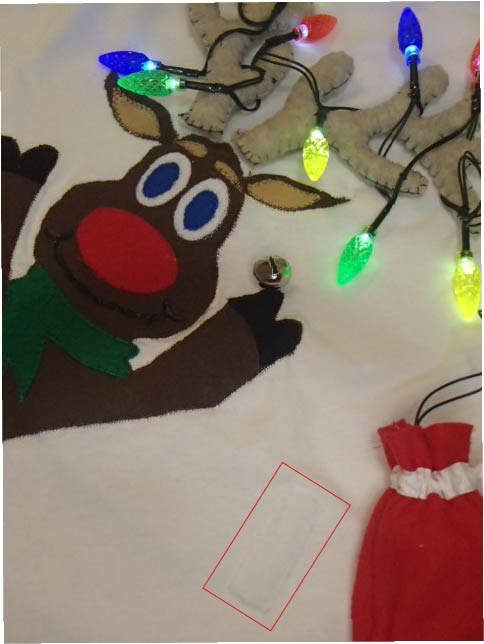
Last you will have to add a piece of Velcro to the shirt for the bag to attach to.
Finishing Details of the Unique Reindeer Shirt

To make it look like the reindeer was actually carrying the bag I needed something to attach the Santa bags string to. I first thought of a black button but changed to a jingle bell. I hand-stitched the bell in place and then wrapped the bag’s string around. The final detail I added was a smile on the face of the reindeer.
Final Pictures of the Unique Reindeer Shirt

Hope you are excited to now create your own Reindeer shirt!!! Make sure to check out Reusable Fabric Wrapping Christmas Bags Or yesterday’s post on creating your own Light-up Santa Headband!!!