Day 23
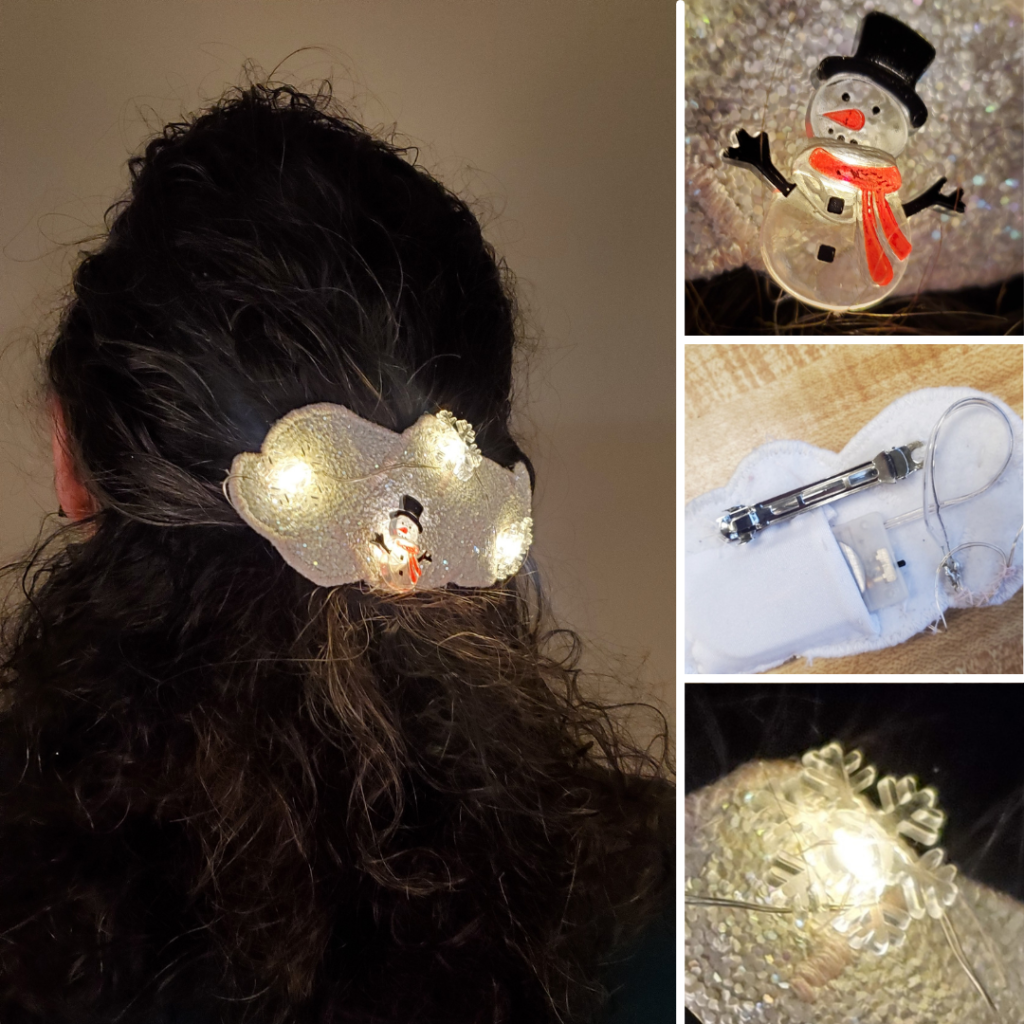
You know what winter is all about? The cold and snow, of course! That’s why I wanted to make a light-up comb for myself. I found these fun LEDs and knew I could quickly combine them to have an awesome Light-up Winter Hair Barrette! I always dream of a white Christmas!! It is a wonderful time of year to play outside in the snow and then go inside and get a hot cup of coffee, tea or Chocolate. Follow these easy steps on how to create your very own LED hair accessory!!!
Gather Your Materials
- White Felt
- Sparkel Felt or Foam paper
- Unique themes LEDs
- Battery Pack
- Batteries
- Hair Barrette
- Soldering Kit
Design the Light-up Winter Hair Barrette
I wanted to create a winter wonderland landscape on my Hair Barrette. After considering a few options I decided to have one snow man surrounded by three snowflakes!!! I thought about adding a small board so that they LEDs could be controlled individually and have some fun programming. In the end I decided to keep it much simpler and only have the LED be on or off. But I want to encourage you so think about adding a board yourself to this fun project!!!
How to create the Hair Barrette
Now that we have all the materials lets get started in creating the Light-up Winter Hair Barrette
We are going to start by prepping the LEDs. Cut off the desired lengths of theme LEDs and determine the positive from the negative. Next, to be able to solder the LEDs together you will want to sand paper the very edge. Create the hook to easily attach the two wires but before connecting them ensure you have the heat shrink on!!! Solder the wire together, test the full circuit, and then once the circuit proved it is complete heat shrink the connections!!!
Time to make the cloud. I put the felt and foam together and sewed a cloud-like shape. I did not follow a pattern. Next, add a satin stitch for detailing. I added some lines on the inside and then also satin-stitched all the way around the outside of the cloud.
Time to add the Battery Pack and the LEDs!!! I cut a square piece of spandex that was slightly larger than the battery pack I was using. Nest I tuned under the opening edge and stitch it down. Next, pin the pocket onto the back of the barrette and whip stitch it down to the barrette. Insert the battery and give it a shake to see if you need to add a strap. Time to place the LED and sew them on!! I tried a few different layouts before settling on my final look. To ensure I did not have an extra wire going everywhere I twisted extra wire around the base of the LED before sewing them down.
The final step is to sew on the barrette!!! make sure it is secure!!!
Put in the batteries and try on your new amazing Light-up Winter Hair Barrette
Check out the full YouTube Video Here!!!
Final pictures of the Light-up Winter Hair Barrette

DId you enjoy this unique project? Make sure to check out some of the other fun projects that have been created this Holiday season!!!! Some of the Crowd Favorites are the Cherry Cheek Santa Earrings, the Reusable Christmas Wrapping, and of course the Light-Up Santa Hat!!!!

One Reply to “How to Create a festive Light-up Winter Hair Barrette”
Comments are closed.