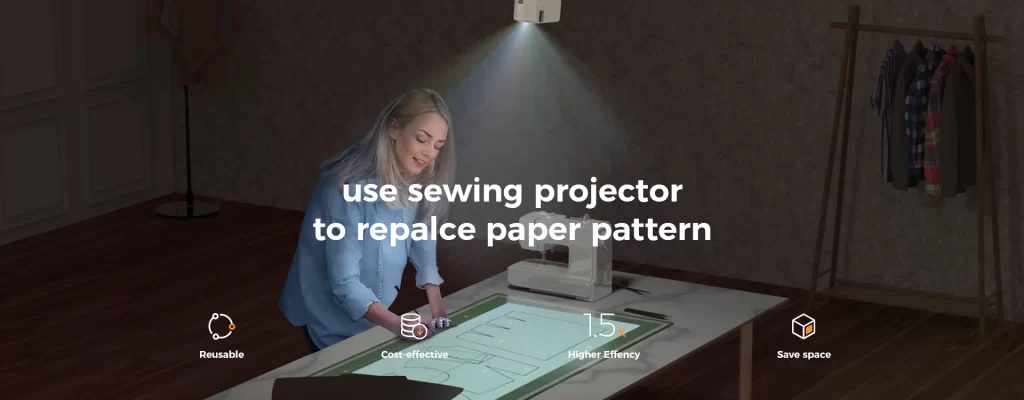
This week I am trying something new, not printing out my PDF pattern but using a Projector to cut out a Digital PDF sewing pattern!!! I have seen other people use these projectors and have been interested in trying one out, so let’s dive in!!!
Initial set up!!!
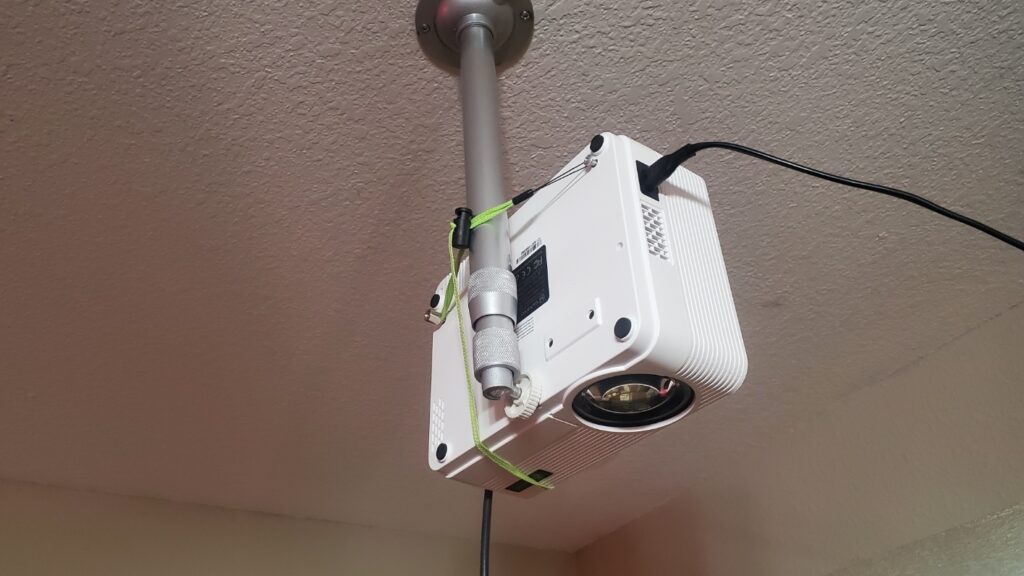
I started by trying to set up the projector in my sewing studio above my table. The provided ceiling mount had a fast and easy installation process. I found that the single screw holding the projector on could not get tight enough to hold the projector completely perpendicular to the table. So I added a string to help support and maintain the projector’s alignment.
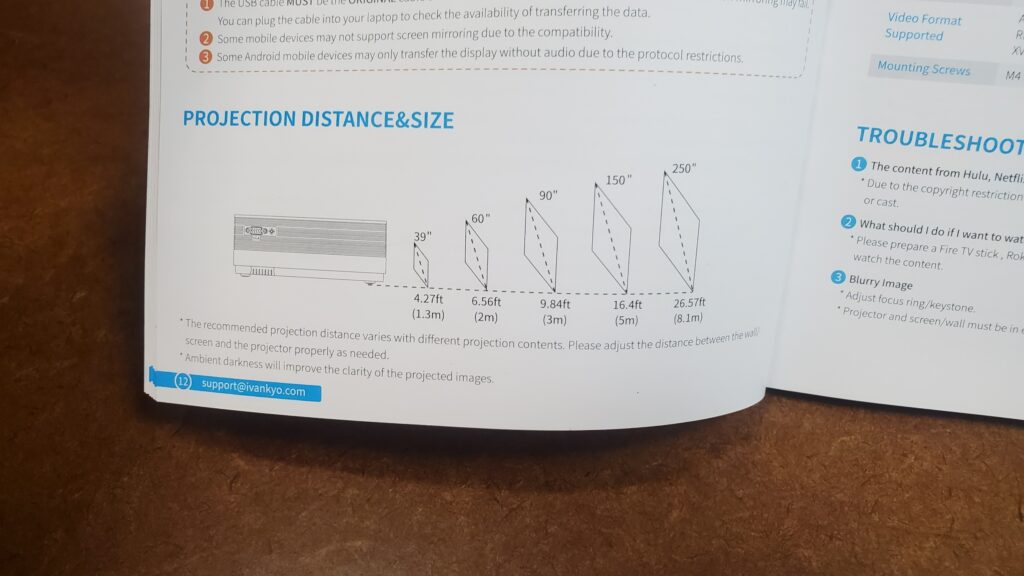
When looking at the quick start-up guide, you can see the approximate size that will be projected based on the distance from the projector to the cutting surface. I knew setting it up in my sewing studio would provide a smaller size projection.
Once the projector was turned on, I knew that it would only be able to display half-scale patterns. This was because of the measurement between the projector and the table. This still would not be a bad situation to be in because of the many half-scale projects I do. However, I knew that I wanted first to try out the projector on a full-scale project by creating a shirt for myself.
Second Set up
I moved the projector into the main room, where we had a higher ceiling. I made sure there was enough space to roll out a large cutting mat on the floor. This changed the distance between the projector and the cutting surface to close to 9 feet.
Technical Aspects of the Projector
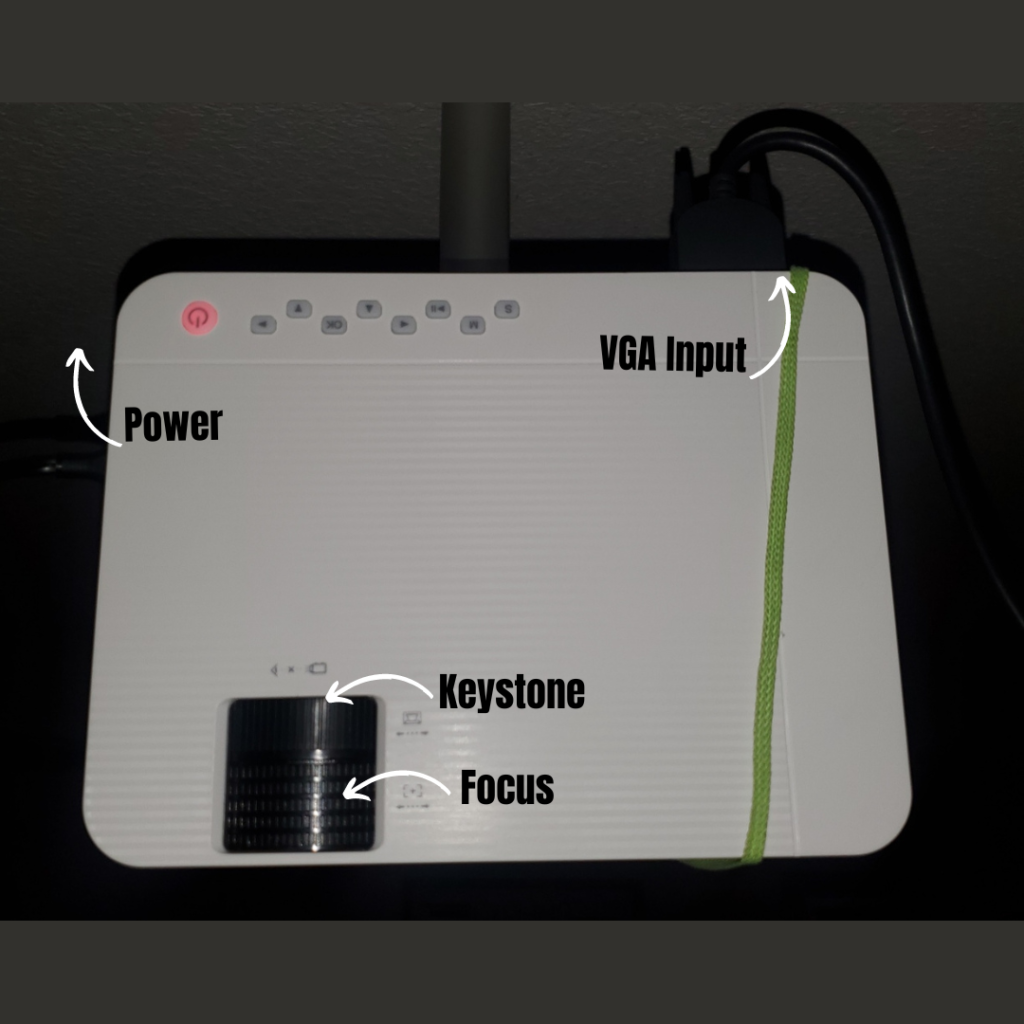

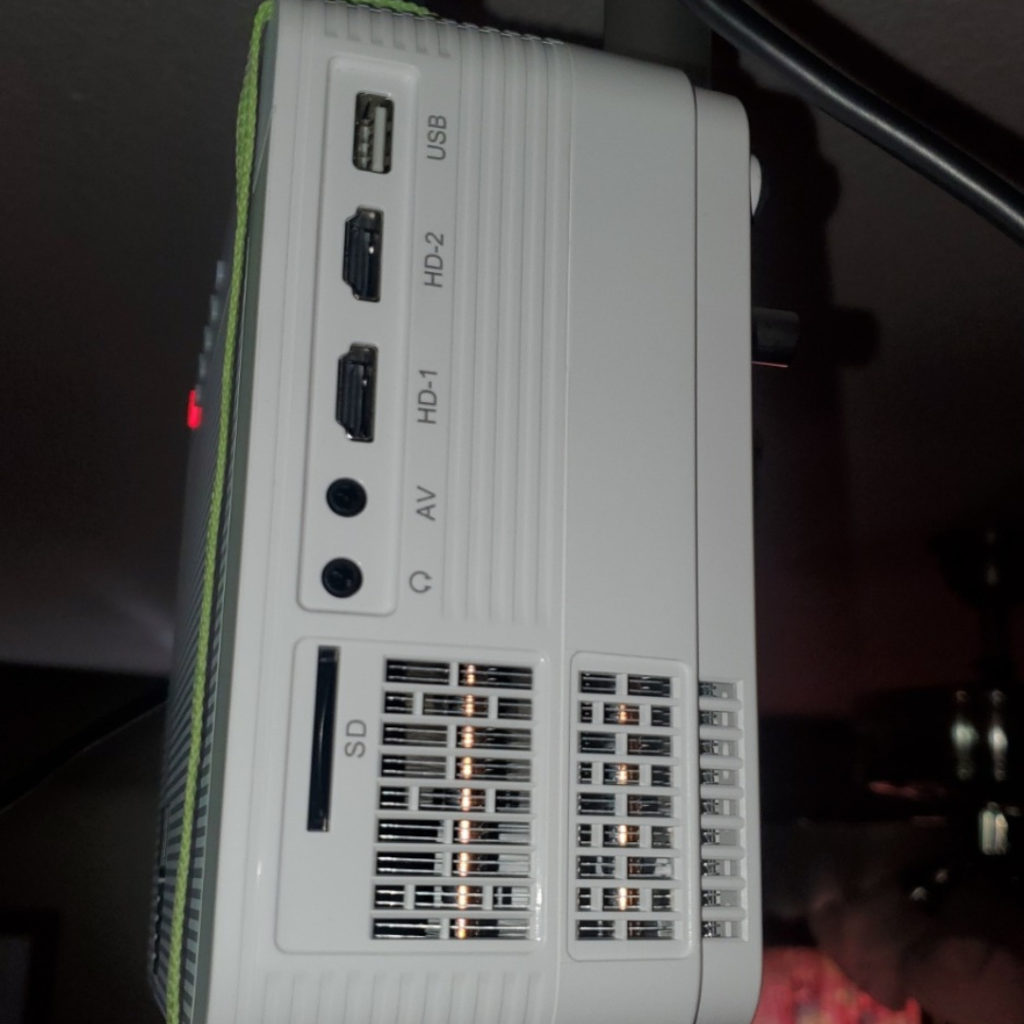
Once the projector is mounted, you will need to use the focus and keystone dials to finish prepping the projector for sizing. The focus will sharpen the image, and the Keystone will assist with the skew.
There are many different ways to connect this projector to your computer!! The included HDMI worked great. However, I found it was not long enough when the projector was mounted to the ceiling. I plan to purchase an extra long cable, so I do not run into this problem again.
Sizing the Projector to cut out Digital PDF sewing pattern
Sizing is the most important step when you are trying to use a projector to cut out a digital sewing pattern. If you do not get the size right, your pattern will be cut to the incorrect size or skewed. This part I would always recommend you take the time to do!!! I found that having a friend helped me get the sizing of the projector faster.

Tips for sizing the projector screen
- Started with an 8.5 X 11 sheet of paper and a square on the artboard to get the sizing close.
- Turn on the grid feature on your artboard.
- Set the grid to white and center the picture over the gray background – This made the lines easier for me to see on my Mat.
- Get a grid cutting mat – This way, it is easier to see when the pattern starts to skew.
- Manually type in the numbers to the percentage to slowly change the size
- Take note of the percentage you used!!! It should not change as long as you have the projector and cutting area in the same place.
Laying out the fabric and Pattern pieces
Next, it was time to lay out the fabric. After folding the fabric in half, I lined up the fold with one of the guidelines on the mat. I moved the pattern pieces around on the artboard so that the center back piece was directly over the fold. Then, I lined up the front piece position. After studying the fabric, I decided that the pattern did not have enough of an up and a down pattern direction to make a big difference in appearance. So I could have the sleeve upsidedown to save space on fabric. It is important to really take a close look at pattern direction. If your pattern is distinct or has a nap to it, having a pattern piece upside down can make the final look unprofessional!!!
The final piece of the layout was the bottom asymmetrical piece. I originally patterned this piece a little wider than what my projector could handle. So I quickly brought in the side seams so that the pattern was not as full at the bottom and could easily fit on the screen. I love how fast and easy I could manipulate the pattern on the computer to adjust to the needs of the final design.

Time to cut out the Projected Pattern Pieces
This is the part I was the most unsure about… how easy a projected pattern piece would be to cut out?!?! Would your arm or shadow get in the way of the cutting line!?!? But I was easily able to see the lines while I was cutting. I look forward to seeing how exact the cutting process would be for a more fitted garment. Since this was a loser knit shirt, I was not super worried about a 1/4 inch of error. If I was doing a fitted garment, I would trace the pattern onto the garment and then cut out the pattern.
Check back soon to see how this shirt is sewn together and get the pattern for yourself!!!
YouTube Video Comming Soon
Final thoughts on the Projector
The main thing I would recommend to anyone looking to move to projected patterns from printing out is to make sure that you have a tall enough ceiling. The ideal space you need in between the projector and the cutting space is 9 feet.
As this mount worked fairly well, I would highly suggest getting an upgraded cieling mount for long-term stability. I found with this mount, the projector would sometimes move because the computer cord was knocked. I believe with a there or four point stabilization mount the projector would not move as easily,
Know that it will take a little time to size the projector. Once it is sized, write down the percentage so you can always set up your artboard to that size and quickly align the workspace. This number should not change, so knowing the percentage will quicken the setup process.
The cutting space will need to be darker so that the projected area can easily be seen. I turned off all the lights in the area and only had ambient light that was coming through the curtains and projector.
Using this Projector to cut out Digital PDF sewing patterns is a new way for me to cut out garments. Being able to project more of my PDF sewing pattern directly onto the fabric is something I am super excited to keep doing. I am excited about how fast I was able to project my pattern onto my fabric and get cutting!!! As well as make some on the fly alterations to ensure the patterns fit onto the fabric.
This projector was a very fast setup. I was quickly able to connect my computer and get sizing and cutting. This is a great projector to bring your PDF patterns to life without having to print out and tape many 8.5X11 pages together. Ensure you have cords long enough to connect your commuter to the projector.
The VANKYO 470 Projector is a great projector to use for cutting out PDF patterns projected onto your fabric!!!
Find this projector
You can find the link for this projector HERE.
Use the Coupon code: CREATIVEHADLEYDIKE to receive an extra 10% off!
Materials needed to use the Projector to cut out Digital PDF sewing pattern
Interested in learning how to digitally apparel pattern?
Get patterning faster with these steps
Check out some of the other garments I have made digitally!!!


Grab the Key commands