I love Cold shoulder shirts. I love Dinosaurs and combining them together is a great idea!!! A Dinosaur shirt has been on my wish list for a very long time?? I have always preferred a shirt that has an interesting element to its design to a regular t-shirt. Let’s make this Cold Shoulder Knit Shirt!!!
Gather your Materials
- Fabric
- Pattern
- Scissors
- Sewing Machine
- Bias Tape maker set
- Pins
- Iron
Let’s get building!!!
First, we are going to start by laying out our fabric. When we cut the two pattern pieces out, we want to make sure that they face the same direction, dinosaur heads up. We have all accidentally cut a pattern piece out the wrong way and then did not have enough fabric to redo. So make sure to pay attention.
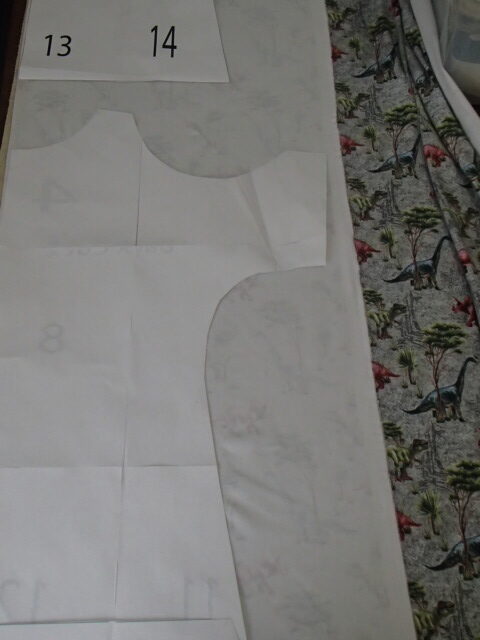
I also chose to cut both of my pieces on the fold and not have a center front or center back seam. Depending on your fabric and how the pieces’ layout, determine how you want your pieces to layout on the fabric.
Making the Bias Tape Binding
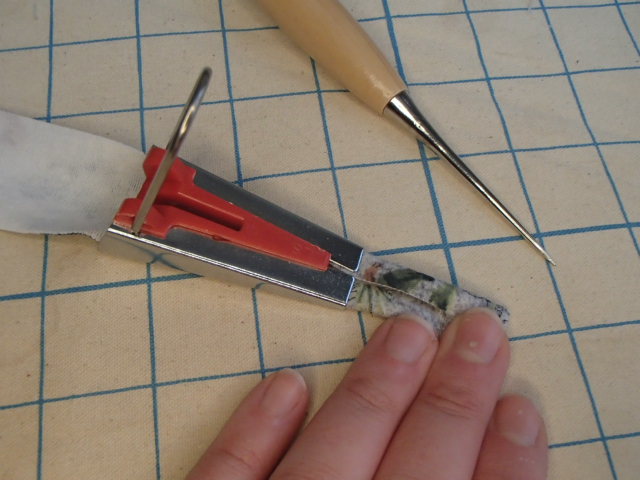
Now that the pieces are cut out, I am going to cut out some binding pieces to bind my cold shoulder openings and the neckline.

Next, I will use my bias tape maker and iron my binding pieces so that while I am sewing the pieces onto the shirt, I am not fighting with the binding pieces.
Sewing the Binding on

To sew the binding onto the edge, I fold the binding in half over the fabric’s edge and pin only at the beginning of the seam. You can continue to pin all the way around each edge. However, I slowly stitch the binding on freehand. I chose this way so that I would slightly stretch the binding as it goes on to not over-stretch the two fabrics. Repeat this process on each edge that needs to be bound.
Once all seams are bound, it is time to sew the garment together. I lined up the shoulder seams and straight stitched about 3/8th seam allowance. This would provide some extra stability to the shoulder seams. After the shoulder seams were stitched, I serged the two pieces together.

Next comes the underarm and side seams. I lied up the edged and serged them together. I chose not to add a stability stitch. If you want the extra security, then add in the extra stitchline. Repeat on the other side.
And you have a basic shirt. Gotta love these shirts that are really simple in constructing but look great on!!!

The last thing left is to hem the sleeves and the bottom of the shirt. I turned up each edge 5/8th of an inch and did a straight stitch all the way around. Time for one final press, and now I get to put in my new awesome Dinosaur cold shoulder shirt!!!
Finished Shirt


Did you miss the patterning of this shirt? Make sure to check it out Patterning a Cold Shoulder Knit Shirt!!!
Want the Key commands and charts I use to create this pattern in Adobe Illustrator?