This week I had found so fun fabric at Joanns that caught my eye in the remnants pile. I knew that I wanted to make a fun new shirt out of the fabric. I quickly opened up Illustrator and got patterning my new Floral v-neck Shirt.
Gather The Materials
- Computer with Adobe Illustrator on it
- Your Sloper for Knits
- Completed Pattern
- Fabric
- Tape
- Sicissors
- Water soluable Pen
- Serger
- Thread
Designing and Patterning the Floral V-neck Shirt
Front
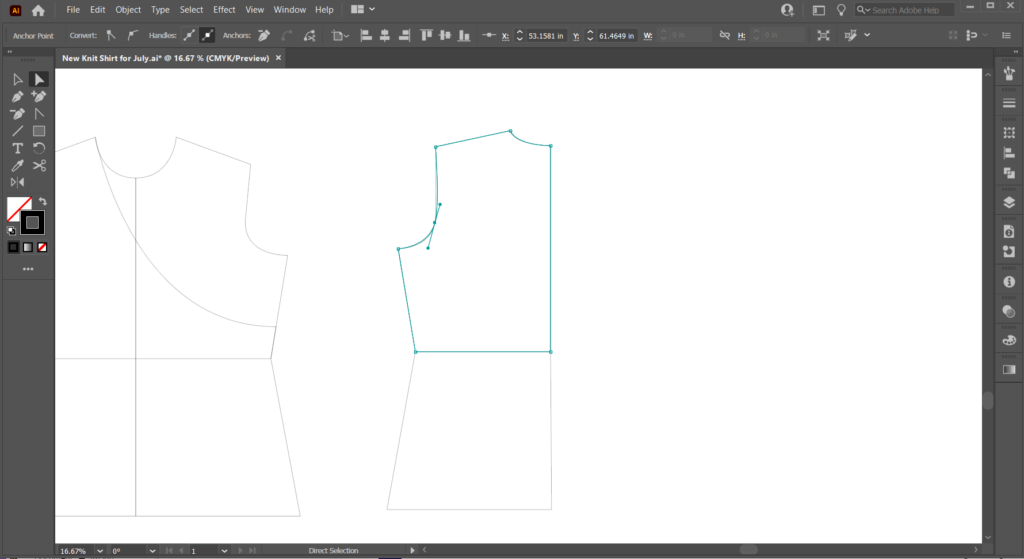
From the start, I knew wanted a v-neck garment with some fun flowy sleeves and a waist seam because I still love to wear belts with my clothing. I also knew that I wanted to have the top part of the bodice be a mirror image that crosses the centerline. So I began by reflecting on my sloper so instead of having a half of a front pattern I had the entire front piece. Next, I inserted the line where the top of the front of the bodice would meet the back. I took note and also added a seam mark on the back pattern. Time to create the fun new neckline!!! Using the pen tool I marked out the new neckline I desired. I finished tracing around the rest of the top half of the bodice to create the pattern. Next, I traced the bottom part of the front of the bodice.

Back
Time to move onto the back pattern!!! Since I marked the back at the same distance as I did the front I can easily add a line going across the back and continue tracing the bottom half of this shirt. Finally, it is time to trace the top half of the back of the shirt.

Sleeve
The sleeve is the part of the shirt that will take me the longest to pattern draft because I am not only creating new design lines but actually having to slash and spread the sleeve to create the fullness I desire.

Print, Tape, Cut, Trace, Cut
The title says it all. I print out the pattern, tape it together cut out the paper pattern pieces lay the pattern pieces out on the fabric trace them out using a water-soluble pen, and then cut that pattern pieces out of the fabric. Then I will be ready to sew the garment together!!!
Building the Floral V-neck Shirt
Let’s put this new shirt together and get excited to wear it!!!
Begin by serging the shoulder seams together. Next, pin in the sleeves a distance away from the edge so that no pins go under the foot of the serger. Time to finish the neckline with a folded rectangle serged onto the entire length of the neckline. Sew the back top of the shirt to the back bottom of the shirt. Pin the two top front layers to the bottom front of the shirt. Again make sure to pin far enough away so that no pins go under the serger foot. Finally, sew the side seam and under the sleeve together to close the garments. I chose to use a pearl stitch to hem the sleeve and bottom of the shirt.
Final look of the Floral V-neck Shirt

Want to begin your own adventure in Digital Apparel Patterning? Enroll now in my course Set up Adobe Illustrator for Apparel Patterning.
Enjoyed this project? Make sure to check out some of these other similar projects. See how I patterned a Neckline Lace Closed shirt and how I built the same shirt.

