You may be wondering why you would want to add LEDs to a tulle skirt. Well, there are many reasons! You can use them for a fun unique design. They could even double up as an extra light if needed – no one will ever need to ask “Where’s my flashlight?” again with this adorable LED skirt. The best part is they’re super easy and affordable so check out this newest tutorial on how I created this amazing skirt so you can embark on your own adventure and make one for yourself!!! Let’s get started!!!
Gather your materials
- Pattern
- Underfabric (what the LED will be attched to)
- Tulle
- Thread
- Scissors
- Ruler
- Sewing Macing
- Regular sewing foot
- Gathering / Sheering foot
- Fairy LED (6 strings)
- Seeed board
- JST connectors
- Soldering Kit
- Skirt and Hook
- Battery pack
- USB – C Connector
Build a Light-up Tulle skirt
Cutting out the pattern pieces
Now that the pattern has been taped together it is time to lay out the pattern and cut everything out. I also cut 34 square pieces of tulle that will be divided into three piles to create three layers of tulle.
Gathering the tulle
Using the gathering foot I gathered the tulle down overlapping each square by about 5 inches. This created three long lengths of gathered tulle. I do not sew them into a circle yet because I want easier access to add all the LEDs on.
Building a Light-up Tulle skirt
Serge all around the base layer together and stitch up the side seams. Insert the 8-inch zipper up the center back. Now it is time to attach all four layers of the skirt to the waistband. There are a few different ways this can be done. One is based on one layer at a time. I choose to use an excessive amount of pins and sew all the layers at once. This method did end up in me having to unpick and restitch two sections where one layer slipped out of the pins. Finish the waistband and add the hook and bar!! Finally, hem the base layer to the length desired!!!
Adding the LEDs
Time to add on the amazing part to this project that will help you light up the room!!! Let’s sew on those crazy fairy LEDs. Using a wide zig-zag stitch and zig-zag over the wire. You must lift up and move over each small LED. I did not cut the thread at each LED but let a longer piece of thread travel over the LED. I also did not pre-plan where each of the LEDs was going to go. Begin by placing all the beginnings on one seam and winding around the skirt as it felt right.
Soldering the Wires to the board
Whenever I create a light-up garment I make sure that the board is completely removable. This will make it easier to laundry the garment. I use JST connectors and had each string of LEDs attach to a different port so they can be controlled individually.
Once they are all connected together it’s time to start programming to make sure all the connections points are solid!! I always start with a basic program of turning each LED string on and off to check all connection points. That will also ensure any problems before the heat shrink is shrunk. Then it is time to try a few different codes to see the twinkling effects that I desire.
Finishing Touches on building a Light-up Tulle skirt
The final touches to build a Light-up Tulle skirt are to sew on the pocket that will hold the battery and board. Then sew up the center back seam of the tulle below the zipper.
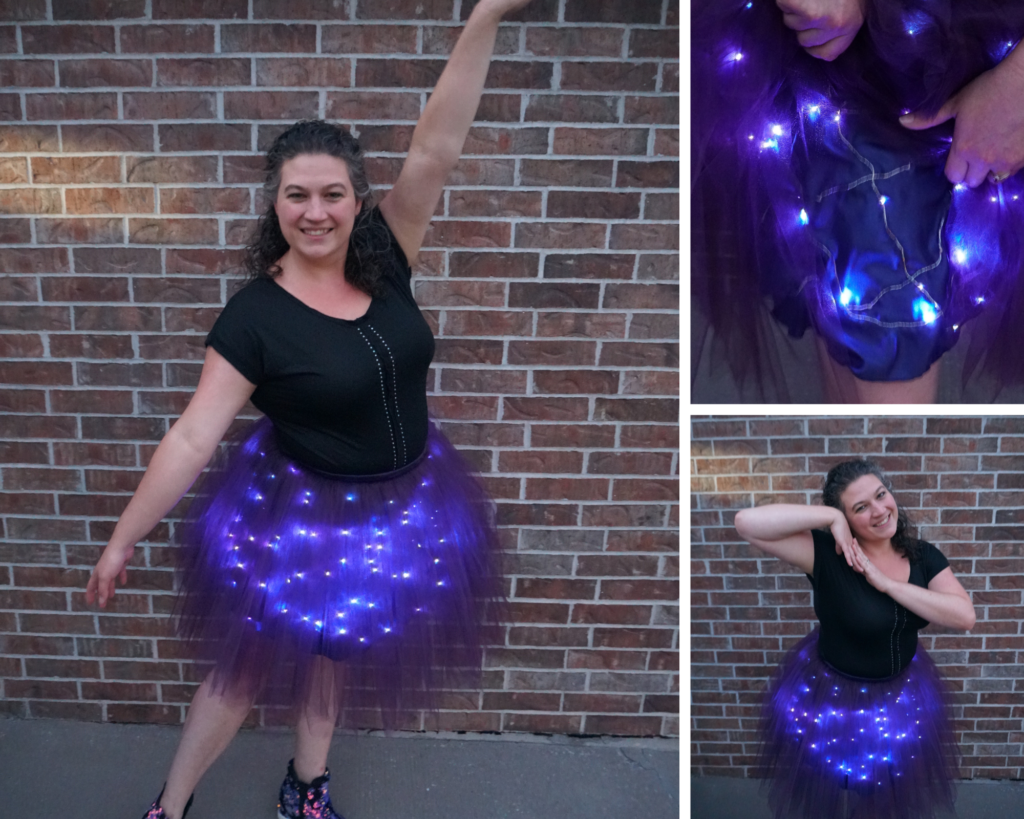
Final Look of the Light-up Tulle skirt
Time to put on the fun new garment and dance around the room!!!
Did you miss how I patterned this unique skirt?? Check it out here!!!
Want to learn how to create your own light-up projects? Grab my free mini-course to start learning the basics!!!
Want to begin your own adventure in Digital Apparel Patterning? Enroll now in my course Set up Adobe Illustrator for Apparel Patterning.
Make sure to check out some of these other fun wearable art projects like this fun floral shirt or this fun light-up hairpin!!!