After deciding that the bride would have a light-up hem, It was time to focus on creating the Groom’s Wedding Light-up Suit. It was so important to us that if one light up, the other had to. This would create our cohesive look and add to the surprise reveal at the reception.
Designing the Groom’s Wedding Light-up Suit
The easiest way to light up the groom would be to add a stripe down the outside of the pants leg. We also wanted to have his vest light up but did not want the whole front ablaze. Therefore we settled on having only the hem light up. The easiest way to insert LEDs into the hem would be to make the vest myself. I also figured that since I would be making the vest, I could create a board and battery pocket hidden inside. This would ensure the pants pockets free for other essential products.
Building the Vest
When creating this vest, I knew that I wanted all components hidden with a few wires seen as possible.
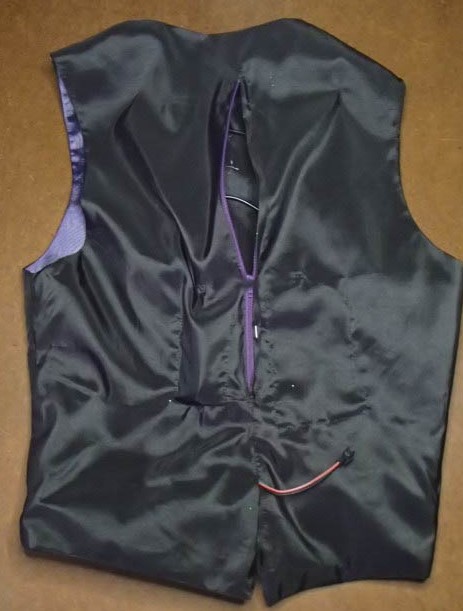
I started by inserting a zipper in the center back lining on the inside. This would provide the access point to the LEDs, board, and battery. Also, in the center back seam, I left a small opening that the wires from the pants would be fed through to attach to the board and batter. Next, I completed the rest of the vest, ensuring access to the vest’s front through the zipper in the back. Make sure to do a fitting with the Groom because once the LED’s are in, you won’t want to alter the vest.
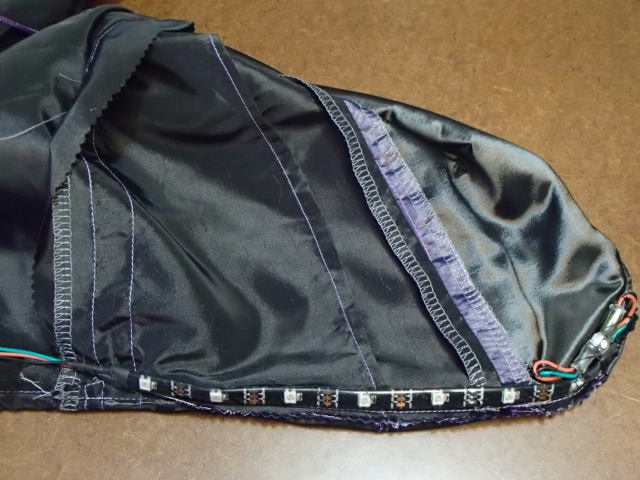
Once the vest is made, it is time to add the LEDs in. Measure the hem of where the LEDs will be placed. I was able to cut the v of the hem into 2 sections. Then join the two strips together with a single extra NeoPixel. I used the sticky back of the tape to adhere the LEDs down. Then whip stitched around the entire strip to secure the LEDs to the vest firmly. Once the LEDs are firmly on the vest, it is time to try it on a final time.
I always suggest dancing around with the LED on!!!
Adding the LEDs to the Pants
Once we had the groom suit in hand, it was time to add the LED’s detailing. Measure the outseam and cut the LED strip to length. Solder the wire to the end, leaving enough wire to be routed to the center back seam. I like to leave a little extra to know that there will not be extra strain on the solder points later. Open up the inseam so that the legs can be laid flat. Next, place the LED strip down on the pants using the sticky back to keep it in place.
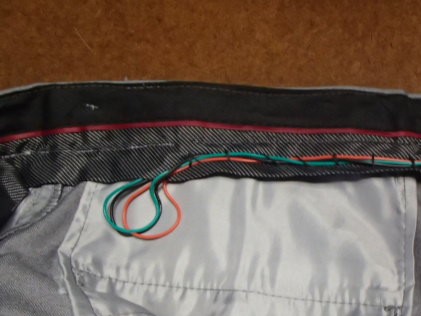
Next, the waistband must be prepped so that the wires can be fed to the inside of the pants. Open up a small hole in the seam that attached the pant legs to the waistband. Make sure to backstitch either side so the hole does not grow when you don’t want it to. Feed the extra wires through this hole so that all the wires will be contained. I also did a whip stitch around the wires creating a casing. This would hold them in place on the waistband while routing the wires to the center back.
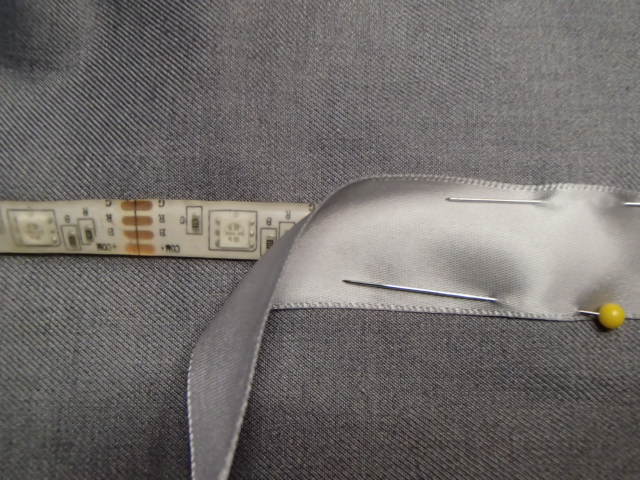
Pin on both sides of the ribbon that will be covering the LED strip. Using a zipper foot topstitch down the ribbon on the edge of both sides. I always move the zipper foot side to side, so I stitch from the waistband to hem on both sides.
Wiring the Pants to Connect to the Vest
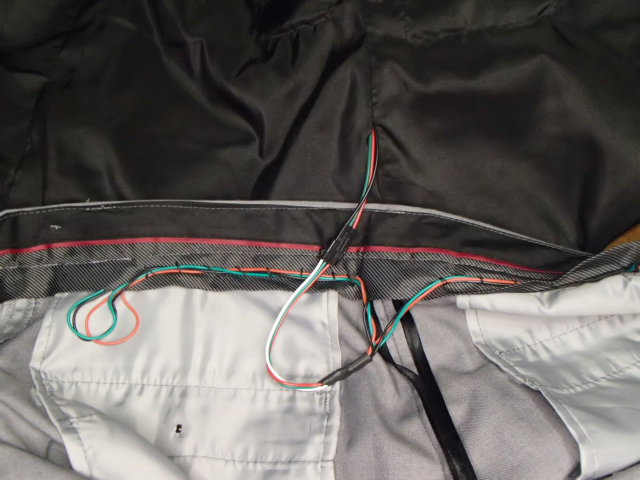
Once both sides have their LED and ribbons attached, we are going to solder the wires together. Make sure that you are soldering the correct wire together. It is common to use colored with so that there is no mistake. Solder the two wires to a single wire that is attached to a JST joint. This way, the pants and vest can be worn separately and hang separately in a closet.
The last two steps would be to sew up the inseam and hem the pants to the correct length. Then you are ready to attach the wires and have a fabulous light up pants and vest combo!
Finished Look of the Groom’s Wedding Light-up Suit


Don’t forget to check out the Brides Light up Dress!!!
Want my Wearable Technology Toolkit Checklist?
