Adding Lights into a Wedding dress is becoming more common. Since LED’s, batteries, boards, and other electronics are becoming smaller and more efficient, adding any electronics has become even easier. Let me tell you about how I added LEDs onto my dress, creating a fantastic bright hem.
Designing the Dress
I love wearable technology and knew from the start I wanted the LED’s in my dress, so I designed my dress to have the hem light up with individually addressable NeoPixel LED’s. First, I needed to decide the silhouette I wanted the dress to have. I have always loved the dresses that have a removable skirt so that the bride can walk around more easily during the reception. Next comes the decisions of where the LEDs will be located and inserted as well as how the LEDs will behave. The choices are endless, especially with individually addressable NoePixel’s. After much deliberation, I decided to line my hem with lights that would beat to the music.
Drafting and building the Dress
I had always wanted to create and drape my own wedding dress. Wedding dress shopping is a great way to research the silhouette that you like. It’s always good to try on many and see what might surprise you! I began by padding out my dress form to match my body. Next, I created the base layer and cut the mock-up out of muslin to the first fit. After the fitting, I made the necessary adjustments to my pattern and started making my dress. Since I was adding pleats down the front and back, I pinned the base layer on the form and draped the pleats on top. Next, I added the shawl collar and skirt, completing the gown. Finally, the last thing to make is the full ball gown overskirt that would only be worn during the ceremony and pictures.
Adding the Lights into the Wedding dress
When the dress is completed, the last thing to do is finish the hem. To make it easier to add the LED, I decided to face the hem with a stripe of bias that would then be hand stitched to finish. Adding the LED to the facing made the process much quicker. I first machine stitch the facing onto the hem at the marked hemline. Pressed the seam open and then up.
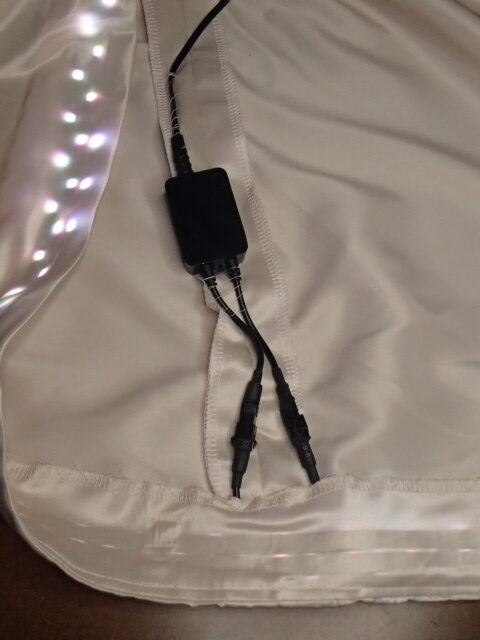
Next, I slowly worked my way around the hem, adding one strand of the NeoPixels at a time. I had 4 strands of 16.4 feet each that would provide me with three rows of LED’s and a small section of a 4th row. After the LED strips are attached, it is time to cross-stitch up the facing. I went around twice because I knew the less were heavy, and I did not want the hem coming down before the end of the night.
Creating the Garter belt Battery Pack
It takes a lot of juice to power 64 feet of NeoPixel LED. I had to buy a 12-volt battery to power it all. Requesting an extension cord at the sweetheart table was important so that the battery could have some time to recharge. Important to make sure your dress is powered all night long! Now I needed to find a place where I could have the battery on me securely and close to the board and LED’s.
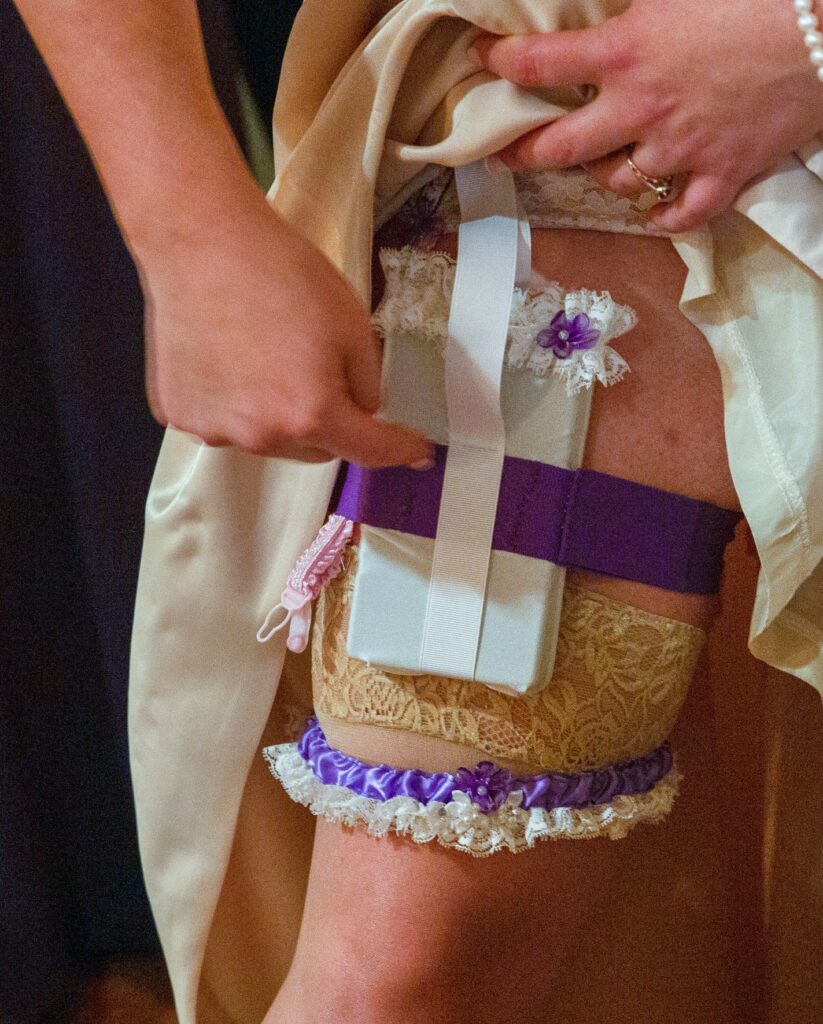
I strapped the battery pack to my thigh. However, it weighs 1.5lbs and needed more support than elastic alone can provide. So I created a belt that went around my waist and connected down to my thigh that also had an elastic band for security. I could dance, jump, and run with no problem with the battery on my thigh, and it did not move.
Final Pictures of my Light-up Wedding Dress
I am so happy with adding lights onto my Wedding Dress. Having the surprise of my hem lighting up and beating to the music’s rhythm made everyone smile at our reception. Keeping it a secret until the reveal at our receptions was a hard secret to keep; however, we are so glad we did! Of course, my Groom also had to light up. Check out how I inserted the LED’s into the Grooms Clothes.


Don’t forget to Check out the Grooms Set Up!!!
Want my Wearable Technology Toolkit Checklist?
