Day 14
Decorating for Christmas is one of my favorite family times of the year. Looking at old ornaments and remembering when or how you got them. The special moments made during this time of year create long lasting memories. Creating new ornaments with your children or significant other helping in making those memories. This year my husband and I decided to make a 3-D printed Candy Cane Ornament that lights up together. We will show you how!!
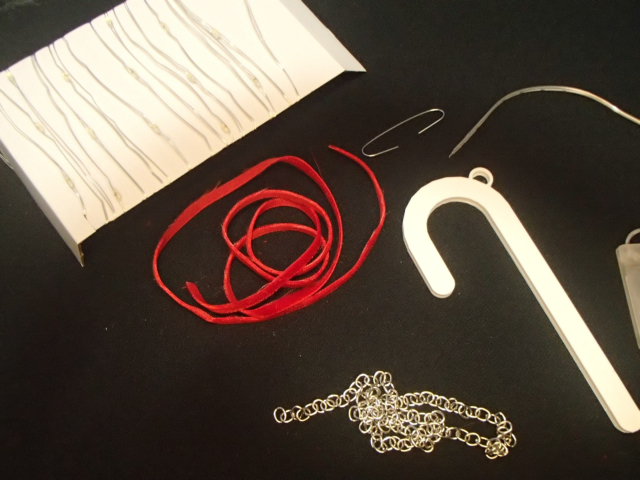
Gather your materials
- Computer
- 3-D printer and filament
- Velvet Trim
- Christmas Ornament Hangers
- Fairy Lights
- Digital Caliper’s
- Glue
- Pencil
- Soldering Iron and Solder
- Third Hand
Making the 3-D printed Candy Cane Ornament
Designing
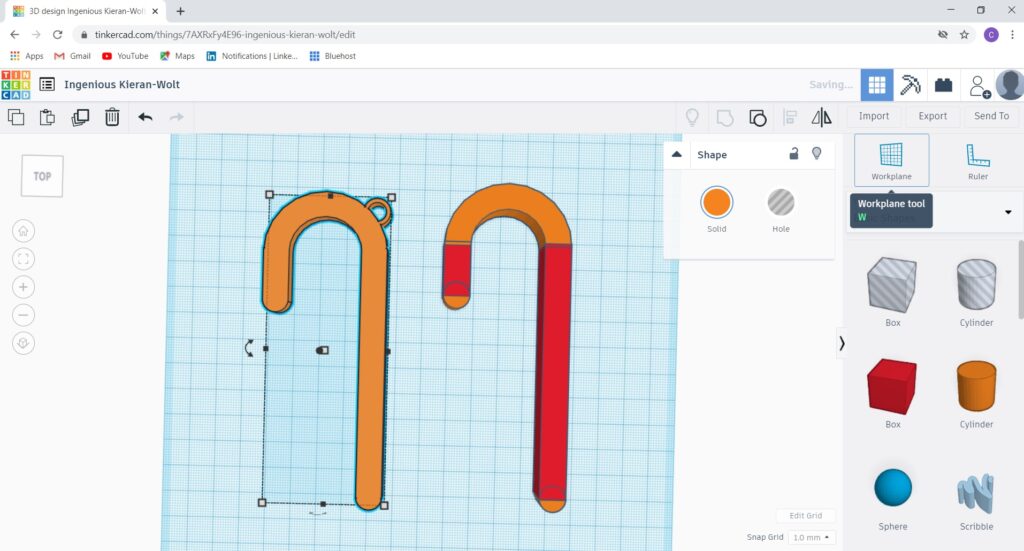
Using tinker CAD we created the basic shapes for our 3-D printed Candy Cane Ornament. Using digital calipers to get the exact dimensions correct.
Now it is time to print it out!!!
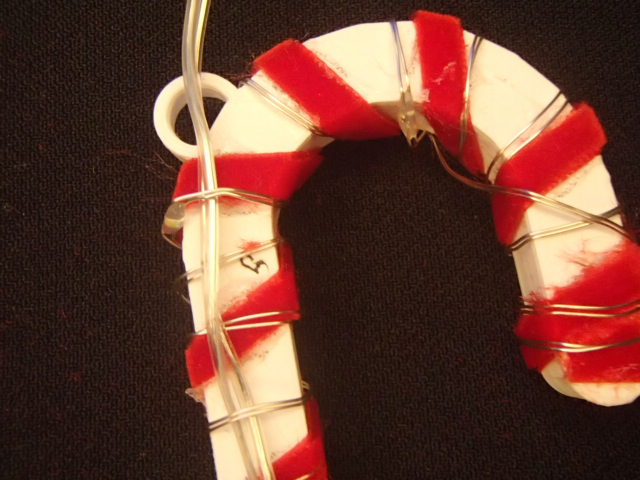
Decorating your 3-D printed Candy Cane Ornament
Velvet Trim
We chose to add red velvet trim and Fairy lights to our 3-D printed Candy Cane Ornament.
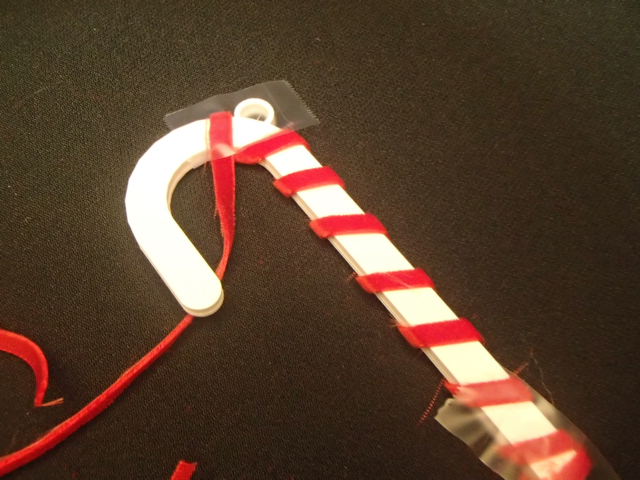
First start with figuring out the spacing of the wrapping of the velvet trim. We used tape to help me see the different spacing.

Once we had the spacing set we marked on the back of the Candy Cane lightly with a pencil where each stripe was going to hit.

These mark the provided us exactly where we were going to add the glue.
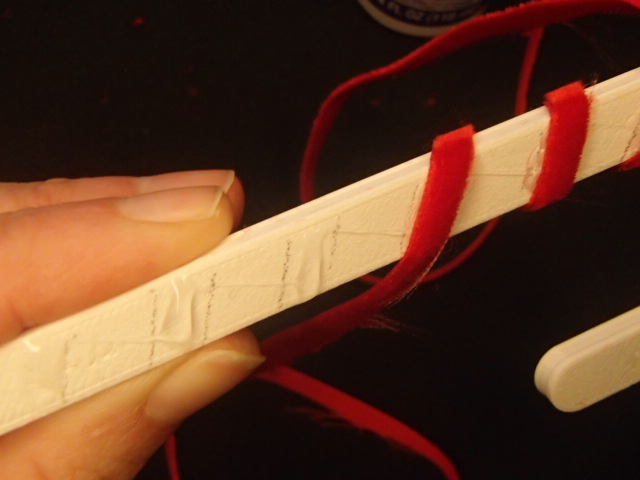
Knowing exactly where the glue should be applied helped line the velvet trim exactly where we designed it and made the process if adding the trim quick and efficient. Once the velvet is added let the glue dry before moving on the the next step.
Fairy lights
Now that the trim is on we can add the Fairy Lights to the 3-D printed Candy Cane Ornament.
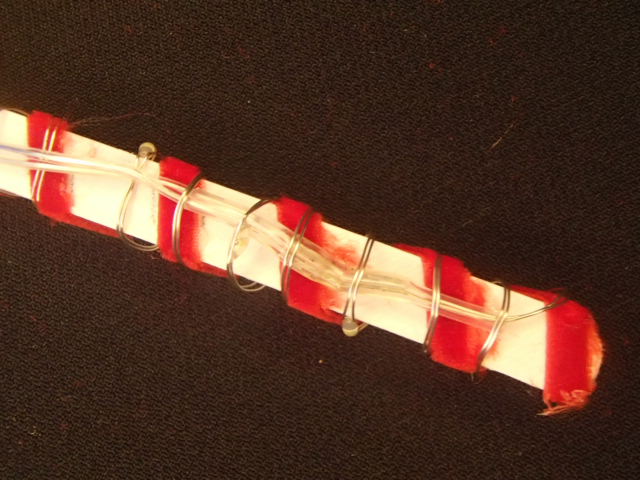
Start with the end that is closest to the wires that will power the ornament. We want to make sure that we securely wrap this down under the fairy lights so that the wires are not hanging out everywhere!!!
Continually wrap to the other end of the candy cane. Wrap a little ways back to really secure everything down.
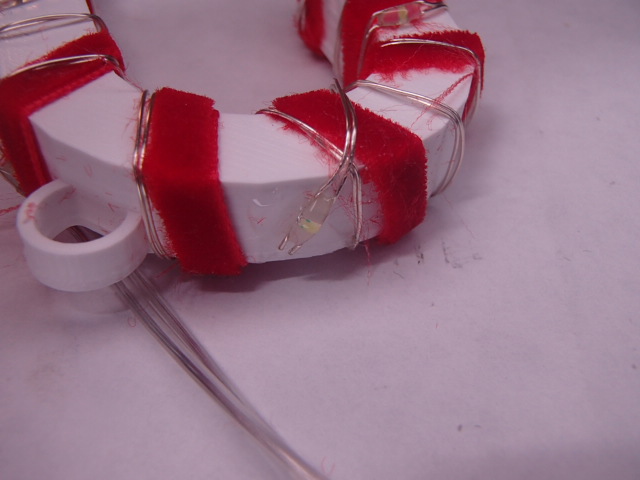
Finally add a dot of glue at the very end and a few dots throughout to help stabilize the fairy light onto the candy cane,
Powering your Candy Cane Ornament
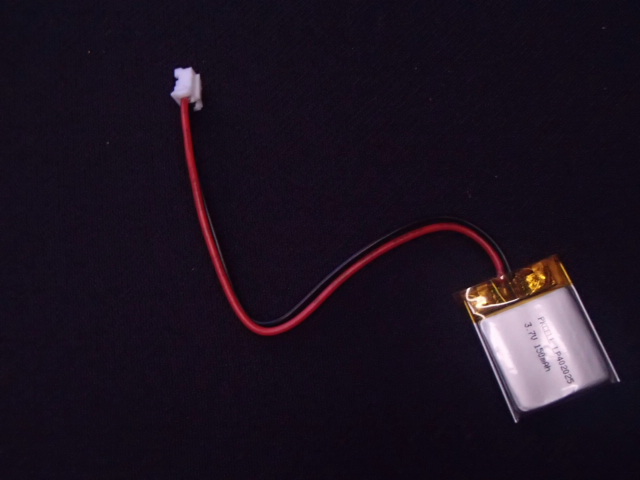
We decided to attach a small rechargeable battery to the candy cane that can be removed by pulling apart the connection. We plan to be able to hide the battery within the needles of our tree.

Its always a good idea to double checked the wiring. This will help make sure the solder points are correct. To help I put a small black dot on both the wire and next to the prong.
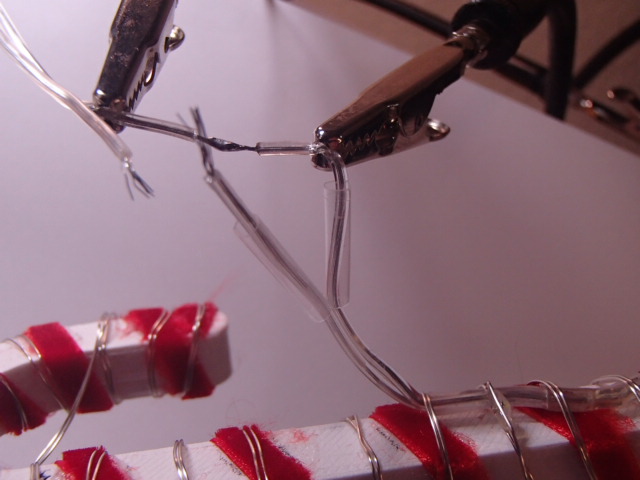
Don’t forget the heat shrink before you solder!!! Tinning the two solder points can help the wire attach to the prong. Tinning is when you add a little solder to the wire and prong then solder them together.

We always do one last circuit check before we heat shrink. Once we have confirmed that everything is working we heat shrink our solder points.

To help with the look of the wiring look a little nice up to the branch I decided to add some chain. I thought the chain looked nice as well as help contain the wire.
Final Pictures of the 3-D printed Candy Cane Ornament
Now all that is left is put in your batteries and turn on your 3-D printed Candy Cane.


Did you miss this past weekend’s fun matching outfits? Make sure to go check out His and Hers matching outfits!!! Stop by tomorrow for another fun project for Day 15!!!