Want to make your outfit stand out? Light up your suspenders! In this tutorial, we will teach you how to use NeoPixels to design and build light-up suspenders. The project is relatively simple, even for beginners who have never used these tools before.
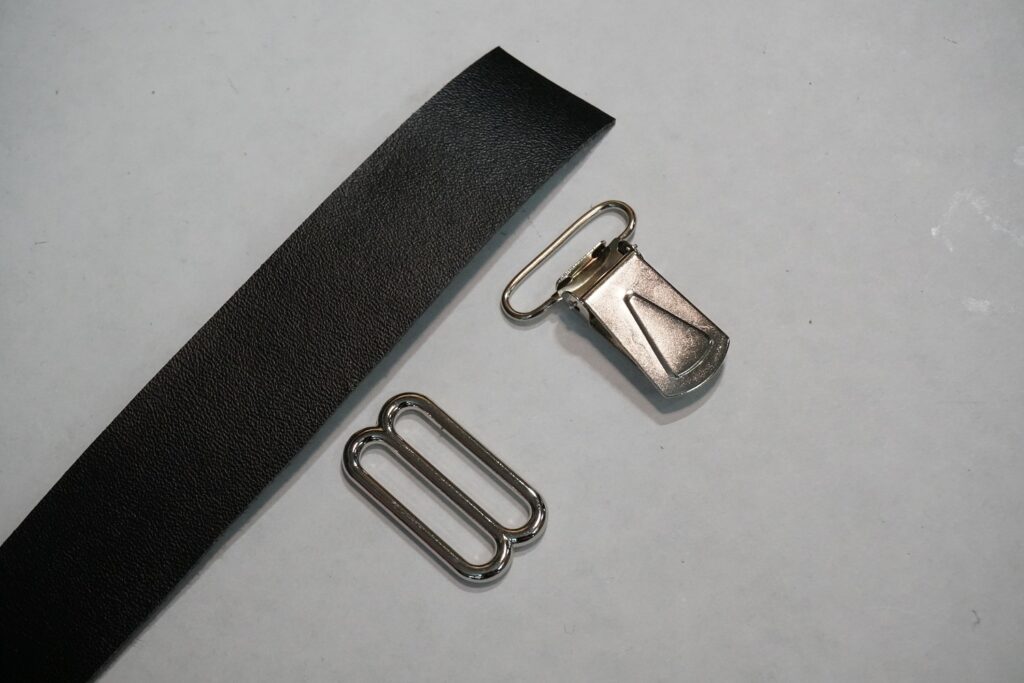
Gather your materials
- NeoPixel LED
- Board
- Wire
- Soldering Kit
- Button
- JST Connector
- Suspender fabric
- Suspender Clips
Creating the Light-up Suspenders Base
Start by creating the base of the suspenders. these suspenders will be more for looks than for true function because once the LED is add onto the straps it is harder to adjust the length. Measure from the waist of the pants in front to the edge of the waistband in the back. Take note of the length where the four straps will come together in the center back.
Once the base of the suspender is complete, make sure to mark out where you will be placing your Arduino Board as this will need to fit into the space created at the center back. We will also need to create a pocket for the battery to be placed into.
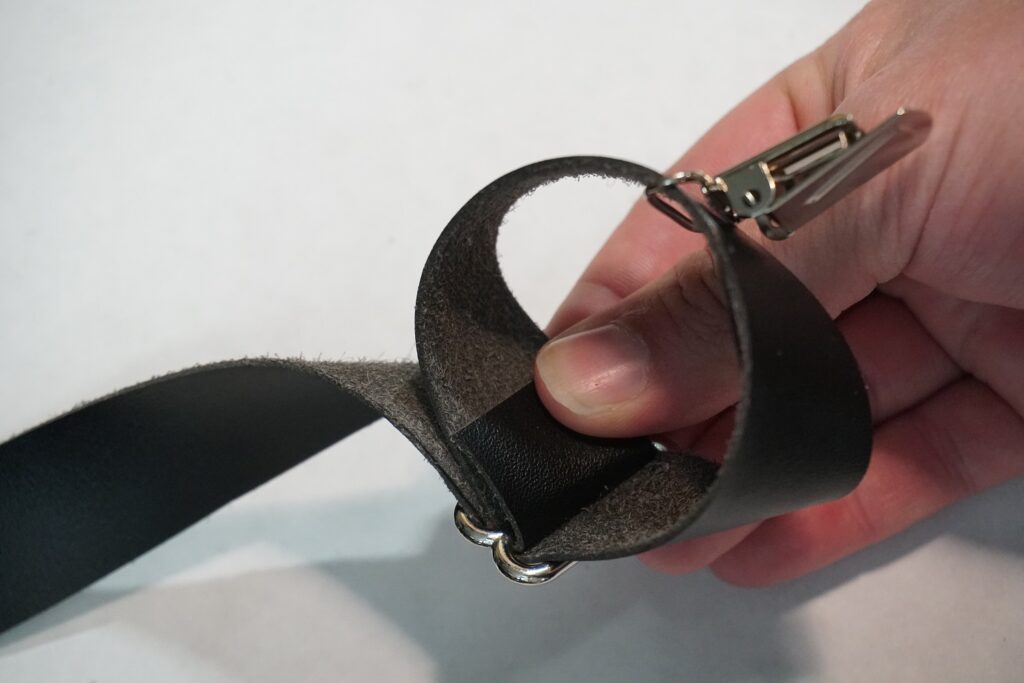
Next, it is time to secure the straps to the center back piece, and the clips to all four straps. Before you secure the clips down make sure you double-check the lengths. Leather is a scaring fabric so once it is sewn once if it needs to be undone you will forever see the original holes. For these suspenders, I used my sewing machine to stitch down the clips in the front. In the back, I fed the strap through the clip hardware and then stiched the end around the adjustments loop. This way the suspenders are slightly more adjustable in the back. Once everything is finalized I always suggest trying them on one more time. It is easier to change anything now than after the LED is on the suspenders.
Soldering the NeoPixels for the Light-up Suspenders
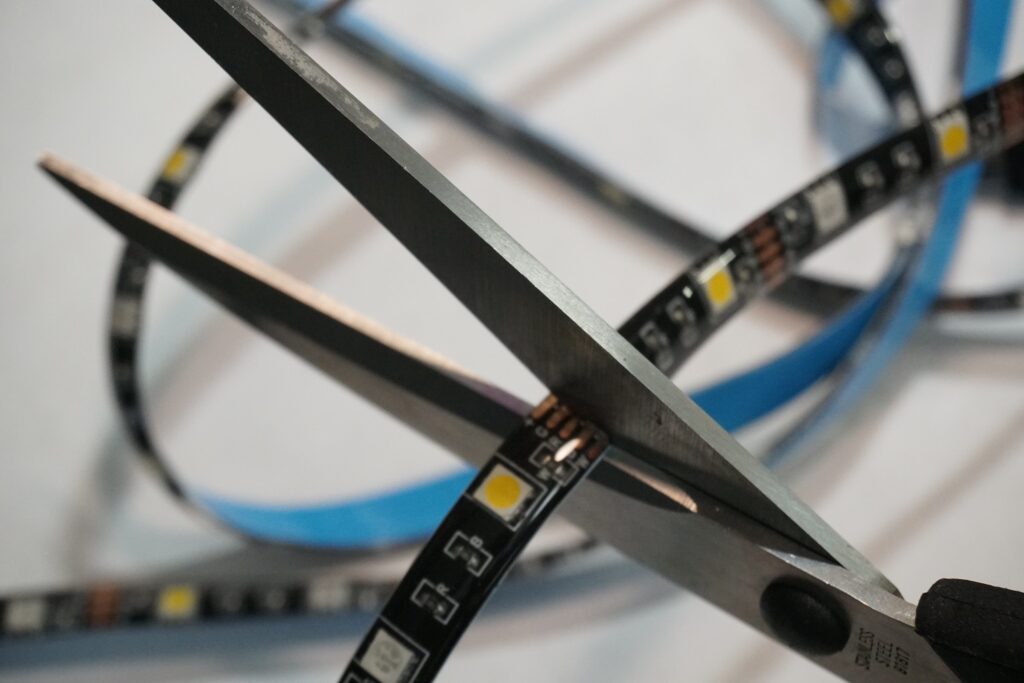
Let’s get the LED added onto these suspenders so we can light up the room!!! First, we are going to measure the length of the LED from the center back Dimond to the front waist. There are very specific cut lengths that you must follow. Find the one that is the closest to the length that works best and cut that length. Measure the second length of the LED for the other side.
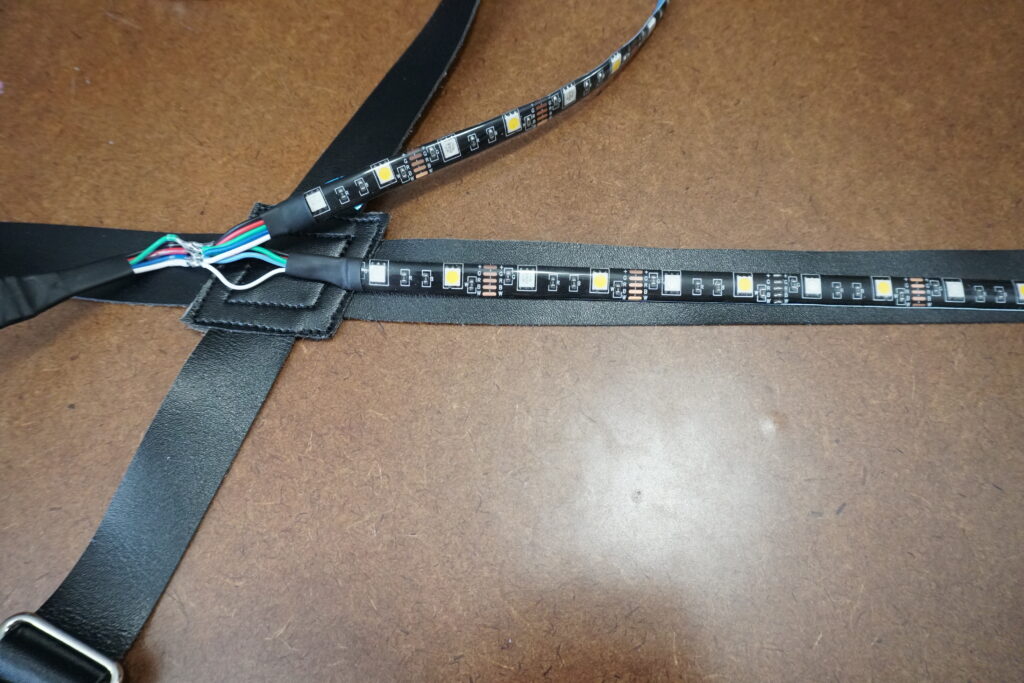
Time to solder them together so that they react the same from the programming on the board. I began by solder s short length of wire on the both second NeoPixel strip matching up the colors of wire with the first strip. This way when I am connecting everything I only have to match up the color of wire.
Next, I solder all the wires together. Make sure to put the heat shrink on before connecting everything or else you will have to re-do the solder. Check the solder points before shrinking down the heat shrink. It is always good to double-check these connection points now instead of when everything is already completed.
Time to attach the NeoPixel to the suspenders. I used the tape on the back. However, you can also sew in a channel of fabric over the straps that the NeoPixel strip will live in. I liked the look of the LED being seen for this project. Other times I want the LED hidden and be a surprise detail.
Connect the Board to the back centerpiece I did this with a small dab of E6000 glue. It is finally time to try on these suspenders and show off your new lights-up suspenders!!!
Final Look
Want to learn how to create your own light-up projects? Grab my free mini-course to start learning the basics!!!
Make sure to check out some of my other light-up projects, such as my light-up flower earrings or St Pattys Day earrings, and hopefully inspire an amazing project of your own!!!
One Reply to “How to Create Programmable Light-up Suspenders”
Comments are closed.